Author: olanandkate

  • Practice Kit Project #2 – Round 1

    Practice Kit Project #2 – Round 1

    I started Friday after work in earnest with the stiffeners. I took the stiffeners and cut their shape out, sanded them down, de-burred the edges, and set them aside for morning. I honestly believe I’m going to need to go through another practice kit. There are so many things I’m learning not only about metal working, but about the tools. I’ve spent alot more time working with wood than I have with metal. My father taught wood and metal shop for college students back in the 60s and 70s but I never learned this from him. Much of my woodworking skills have been through learning through mistakes, YouTube videos, and even some online classes such as Wood Working for Mere Mortals with Steve Ramsey. I’ve not seen a riveting class yet but I’m hoping that when the restrictions from COVID-19 are lifted I will be able to visit my local EAA chapter and possibly they’ll start holding the SportAir workshops again.

    Enough back story, and on to the rest of the project. The riveting is getting better each time I do it. Again, I will not say I’m perfect, but it’s way better than my very first set of rivets. I can’t wait to have someone look at these and judge them in person, but the rivet gauge is telling me they are meeting spec. The hardest part of this part of the kit was doing the work in these tight areas. And this isn’t tight either. I’ve seen pictures of people having to work in extremely tight spaces where they have to make special tools just to buck them right. Some of these were underset and others were overset. Luckily I’m getting these things figured out on the practice project rather than the airplane kit itself.

    Tighter working spaces

    I did learn another absolutely necessary lesson… Always hold the piece down with a vise or some other clamping mechanism. The picture below shows what happens when I start bucking and the work piece is loose on the table…

    Slipped rivet gun

    I looked at that and had a really good solid laugh watching how it would jump quite a far distance with each impact. And if I count them right it hit four additional times on the piece after it left the middle rivet. Below is another example, before I had fully learned the lesson. Luckily it didn’t jump too far, but it marred the manufactured head on these 470 rivets.

    Marred 470 rivets

    All in all, I got to this part in the project before I decided to call it quits and re-read the chapters on riveting just to see if I’m going to learn more this go around.

    Today’s progress

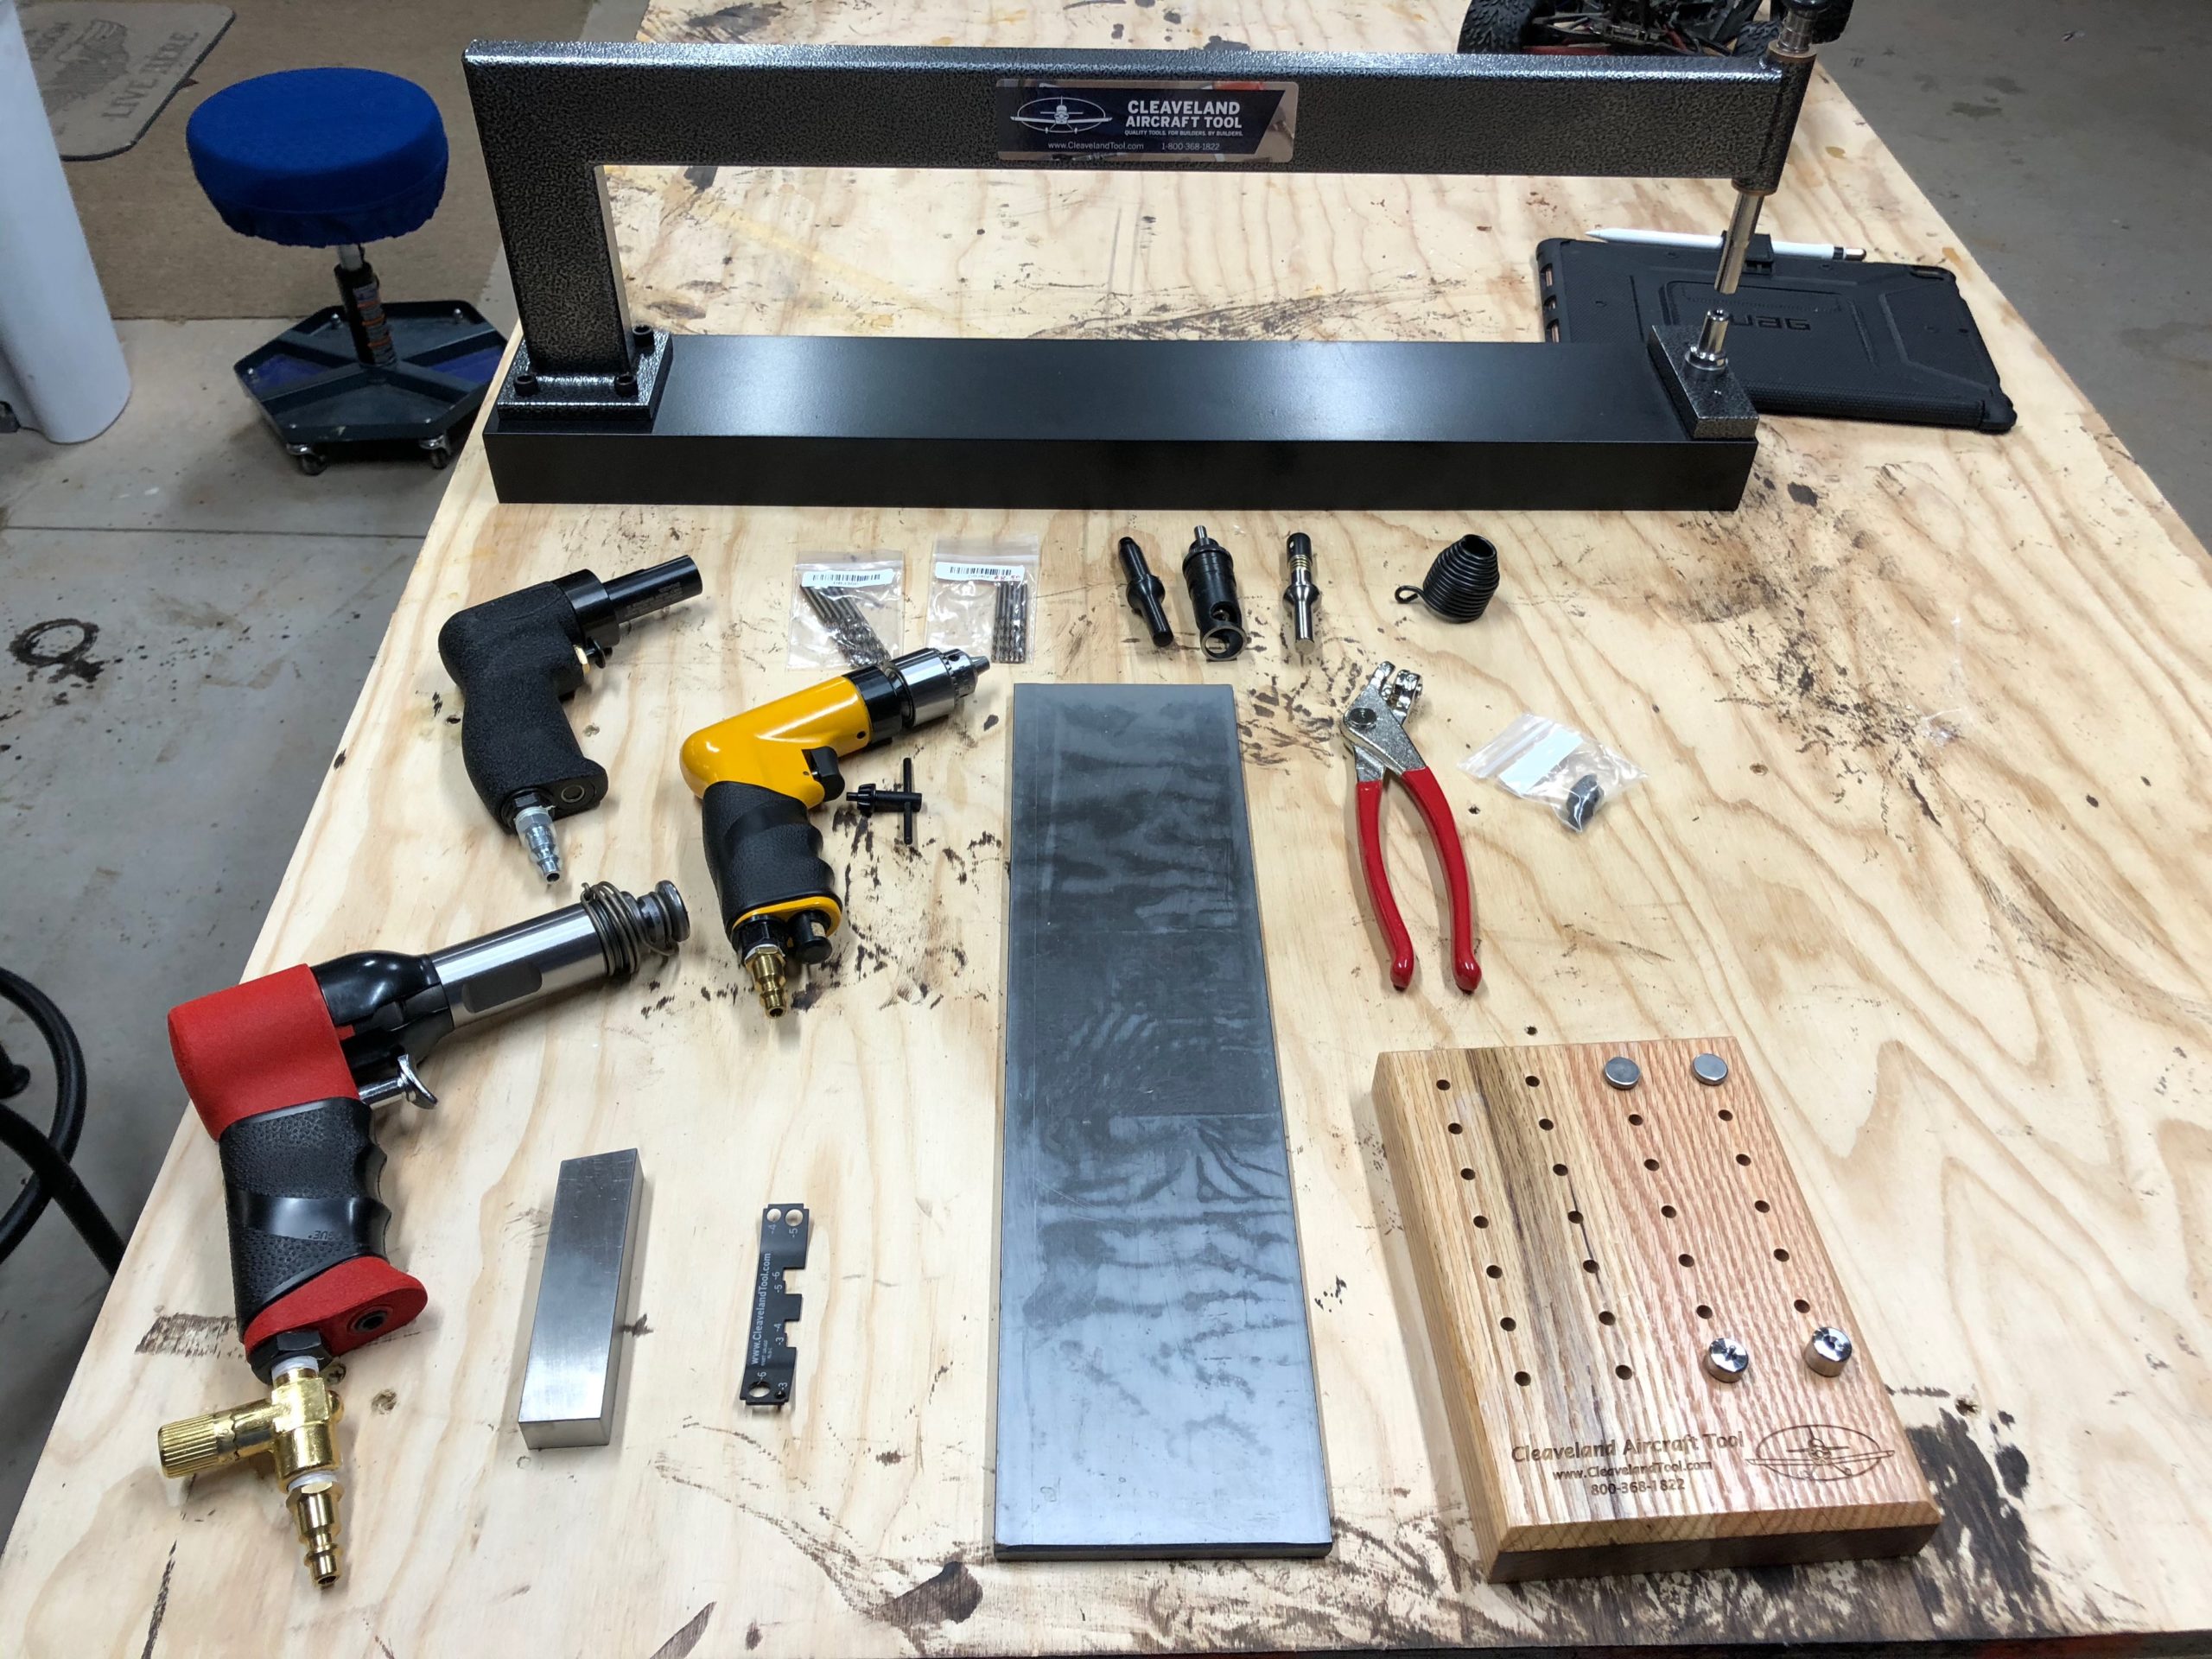
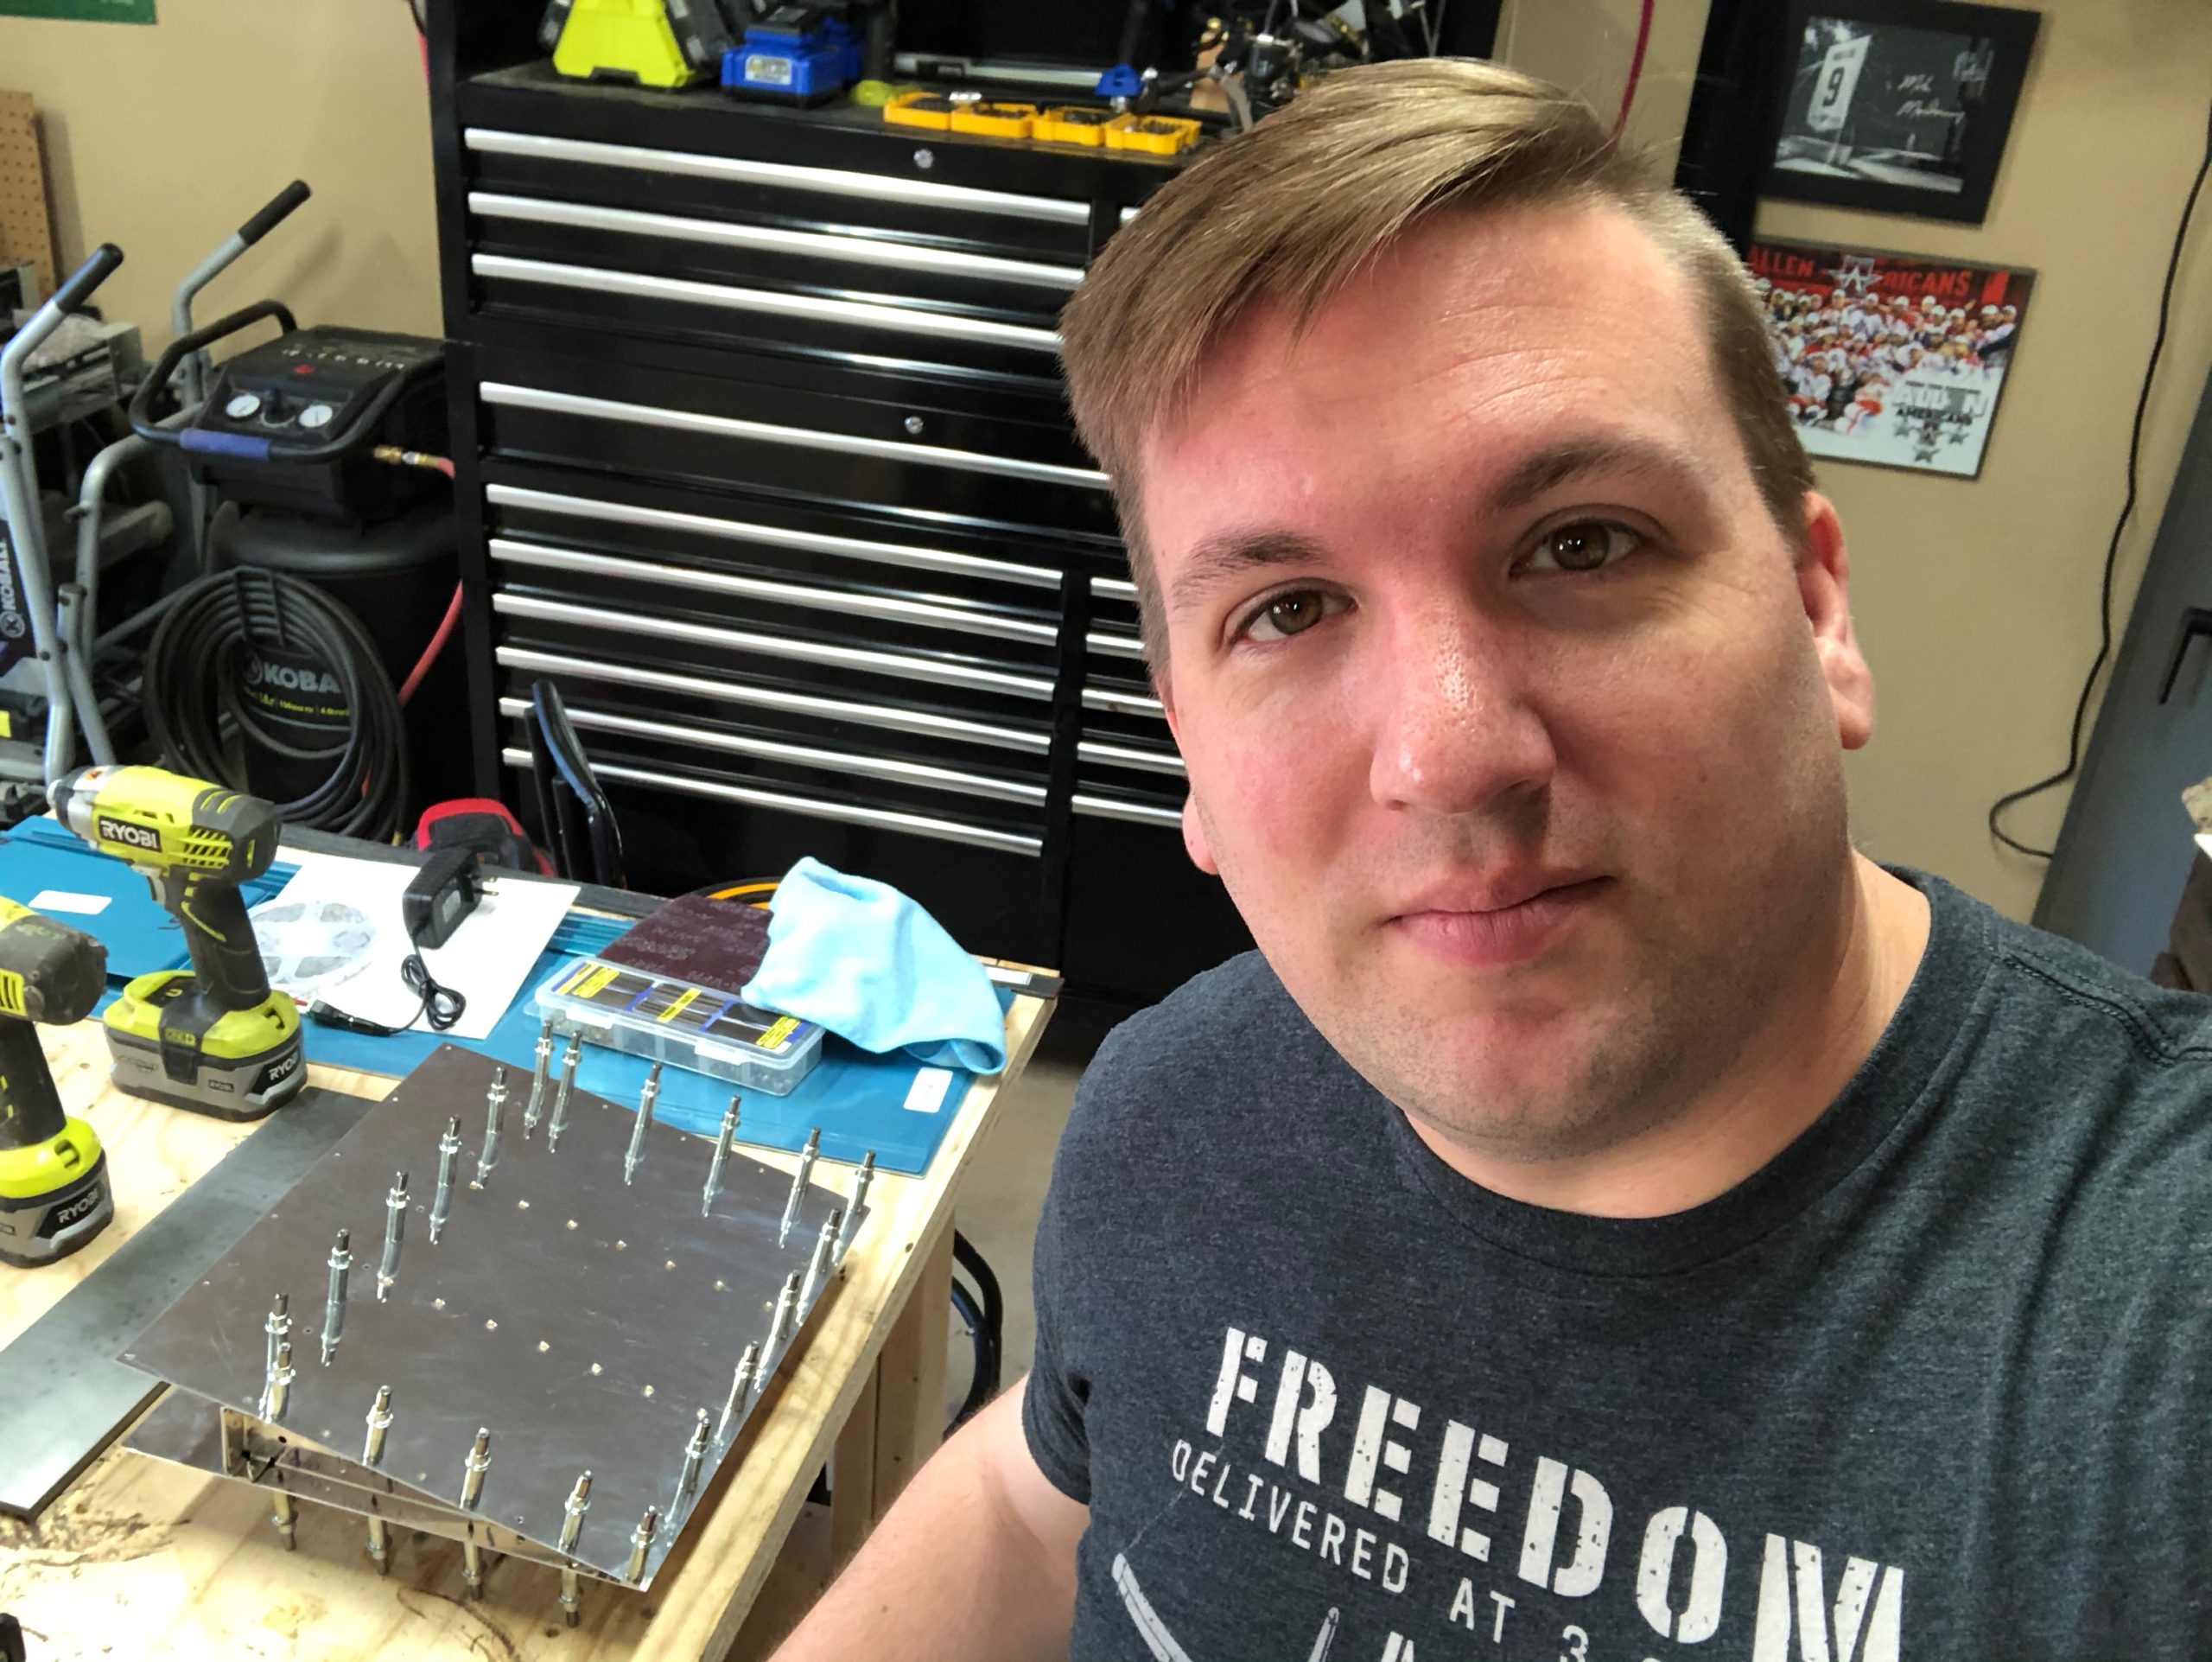
    I have both of the skins drilled and de-burred, the stiffeners have been attached, the spare has been match-drilled and de-burred, the ribs have been drilled and de-burred, and the trailing edge has been drilled and deburred as well. All of this was cleco’ed together to see how it all looked and fit. I was very happy with the progress I had made, seeing the lessons I had learned from the bumps and scrapes on the project surfaces and having the tools all put away for the day. We’ll see how far I get the rest of this week as I also have the Van’s Aircraft light box to build after this.

    After a shower, but before tools have been put away
  • More Tools, Building Practice, and Shop Prep

    More Tools, Building Practice, and Shop Prep

    I wanted to first start off with a video of the final product of what the shop lights look like. They turned out great for the amount of money that was spent. I would really have preferred to have had light boxes installed in the ceiling, but that’s money I just don’t feel like I want to spend right now, and these will do just fine for the time being. I am not a fan of the cables showing but whatever. Sorry for the vertical video as I was too excited to have it completed now. LOL

    Garage lights in action

    Now with the lighting sorted out and plenty of space in the garage, I was just waiting for the rest of the tools I had ordered to arrive. I got the final shipment from Cleaveland and they did an excellent job of packing the items. The tools come in a Craftsman plastic toolbox and each of them are individually wrapped to protect them in shipment. They’ve provided paper packing material in some places to fill in the voids where necessary. The toolbox was then placed in a box with foam blocks surrounding it to isolate it from the bumps from shipment. Everything was accounted for and they even mentioned that they had a few of my tools on backorder and they would ship them when they arrived. None of those tools were needed for the practice kit so I’m fine with that for now.

    All of the tools assembled in one place

    With everything out of the way and the air tools properly connected with the right NPT connectors, I started working on the practice kit. I didn’t bother with working on de-burring the skin on the first project of the practice kit as I wanted to focus on a few things at a time and of course I was excited to use my tools for the first time! The first project only had three steps mentioned which was not a ton to go by for a noob.

    I sat down and really dug in deep to the rest of the material they provided me which was basically all of section 5 and what appeared to be all of section 3 as well. Section 5 covers building basics such as sanding the edges, de-burring both edges and holes, riveting basics, nomenclature, painting, electronics, the whole lot. I will say, this project does not appear that it will give you exact step by step instructions and they expect you to know how to select the right size rivet, drill the right size hole, how to dimple, the lot. But the instructions they do provide, you need to read them word for word and make sure you understand what they are conveying to you before you proceed. Reading schematic/engineering charts is also an art that will take a little bit of practice but is not too difficult.

    After reading up on those sections (which I will probably have to read them three to four more times before I fully understand it all) I felt confident going back to the project and starting it anew. None of the holes for the first line of rivets was drilled on either piece. I took the measurements they provided and marked them on the top skin with a blue fine Sharpie. I used some spring clips to hold the two pieces together and used my drill press to drill the holes. I learned very quickly on the first hole that you need to have a clamp supporting the piece to the drill as well. This is not like wood and will bite you once it penetrates the metal and try to start spinning your work piece on you. After clamping the piece down, I would drill another hole. Release the clamp, move the piece, clamp it down, and drill another hole. Rinse and repeat for each hole along the entire edge. I eventually started using clecos to help hold the two pieces exactly in alignment. Now, this was the only de-burring I did for this first project. I took the de-burring tool and used it very lightly on the back of the holes I had drilled just so that I could rub my finger across it without feeling it snag.

    I will tell you that using the C frame dimpler is actually not that bad. It is quite loud with each hammer swing, but I feel like I quickly got used to the sound the dimpler would make when the hole was fully dimpled. I would have to swing the hammer twice to get it to fully seat which is fine by me.

    Now, it was time for my first rivets… I had set the gun to what I thought was an appropriate level with only 90 psi of air pressure at the tool. I then reduced it even further with the inline air restricter. I selected what I thought was the right rivet and started going at it with the 16″ steel plate as my bucking bar. My rivets were flatter than a pancake, which I knew couldn’t be right, but I kept going trying to work out the problem as I went along. Long story short, each of those rivets was bad and I had to redo the entire line of rivets, but I don’t count this as a failure. This is an opportunity to learn how things feel, and more importantly I get to learn how to remove rivets on a practice piece rather than the real thing.

    Really.. flat.. rivets..

    With my second go around, I finally read AND understood the instructions on how to select the proper rivet and I also got very acquainted with the Cleaveland Tools rivet gauge. This is a very handy tool to get started and sight your eye in to what a proper shop head on a rivet looks like. With that I was able to get these rivets worked out… Not too bad, but definitely not perfect either. Still need the practice, which luckily I will get on the second project of the practice kit, which I plan to start tomorrow.

    Second set of rivets with the right size rivet to begin with

    All in all, I am glad that I’m learning this the hard way now. I’m one of those kind of learners that has to just start and get his hands dirty, learn from my mistakes, and chug along. Here’s to tomorrow’s practice day!

  • Additional Lights & Tools

    Additional Lights & Tools

    My second shipment of lights has finally arrived. I’m not sure why they are shipping all three lights in different boxes, but oh well. It was easy to add this second set of lights and oh man it has gotten nice and bright in the garage! I will definitely not have issues with seeing what I’m doing out here while building. LOL

    Second set of lights up and running

    I also got my first two orders or tools from Cleaveland Tools in. I should have just ordered them all at once, but I had originally thought “I’ll just order some of the tools necessary to do riveting and the learning kit to see if I would like putting this thing together.” Upon receiving the training kit and just reading and imagining putting this thing together, it got me super excited and I just knew I would want to do this! I love putting things together and especially when it has to deal with aviation, I’m all in! I have always loved working with model planes and putting those together, fixing them, tweaking them, etc. Granted this is alot bigger, more expensive, and definitely requires precision and attention to detail, but I think I’m up for the challenge!

    All of the tools in my first shipment
    Just the tip of the iceberg for my Clecos. LOL

    The final shipment of lights and tools are supposed to arrive tomorrow or possibly Friday. I’m excited and I’m almost done reading the book over a few times for the training kit. Once I feel comfortable and have all of the tools setup, I’ll start working on the kit. It doesn’t go into much detail, but I think there is enough there to get the job done with some additional research from other websites and books.

  • Honeywell LED Shop Lights

    Honeywell LED Shop Lights

    I got the first of three pairs of these lights in the mail today. I bought these from Lowe’s online. The model # is SH450505Q200 and the Lowe’s part number is 2500105. I like these for a couple of reasons.

    1. They are easily daisy chained using a standard outlet plug located on the end of each light
    2. They are LED and still very bright (5000 lumen each)
    3. Did I mention they were decently priced? lol

    I thought they were only mountable with the included chains, but it turns out that you can mount these using screws. It’s not super secure, as you can’t tighten the screws once it is installed and it’s more of a slotted hole design to get them on the screws, but it’s secure enough since I shouldn’t be touching them at all (or at least I hope I don’t hit them, LOL)

    Included hardware

    I went ahead and plugged these lights in to the outlet on my countertop to see what they would look like. I have to say that these are really nice and the photo doesn’t do it justice since it was reducing the exposure of the shot.

    5000 Lumen Each!
    Up close shot of the LEDs

    Now, I had to change the setup in the garage just a little because I had a florescent fixture mounted on the ceiling currently. I removed that fixture and changed it to a duplex outlet. Surprisingly, they don’t seem to make much hardware to do this, and even the plate that I found at the local Ace hardware store was too big. I had to drill my own holes to make it fit the 2 3/4″ spacing of the screws. I probably could have search around for the right hardware online, but to be honest, this was just fine for my garage needs.

    Ceiling fixture box changed to a duplex outlet

    From there I used some wall anchors to place the screws at the right spacing and location for the lights and hung them up. I will say these lights are more directional than I thought they would be. The previous florescent light was open 180 degrees, while this seems to have more of a focus of around 140 degrees or so. It was very bright below the lights, but it does restrict how far the light radiates. I figured it would be like this, so that’s why I ordered three pairs of these lights to spread throughout the garage. All in all, I’m very happy with my 1/3 result so far and can’t wait for the other two pair to show up!

  • Under-cabinet Lighting Installed

    Under-cabinet Lighting Installed

    In part of my workspace preparation, I wanted to make sure I had plenty of lighting. I bought these easy install under-cabinet lights from Black+Decker. If you are interested in them, they are the LEDUC9-5CK, and the item number at Lowe’s is 896779. These are meant to be plugged into an outlet, so you need to have one readily available. Luckily, I had just installed a long strip of outlets that I got from Harbor Freight not too long ago.

    They are very bright, and with all five together it gives me plenty of light on the counter top. There are varied segments of wire that they provide you in the kit, as well as some connectors that allow you to butt them up one against the other. There are only two of those though, so you can only have three of the segments together as one light. There are three lengths of cables. One was roughly two inches, another that was 6 inches, and the ones I never used were roughly a foot.

    After-install picture

    The kit comes with these 3M adhesive clips for both the lights and for cable management. They were easy to place and are moldable to wrap around the cables so they don’t fall out. The only tools I needed, was a 1/2″ drill bit and my cordless drill to drill holes through the cabinet sides for the cables to go through. You don’t have to do this, but I wanted to keep the cables as hidden as possible.

    These are adjustable lights, so if you want to change the brightness you just hold down the button on any one of the lights and it will cycle through the brightness for you. Once you find the brightness you want, you just let go of the button. The central power hub also has a motion sensor for turning the lights on and off. I would place this close to your exit path, as I didn’t do this and now I have to walk a little further to get the lights turned off. Not a big deal at all, but just something I didn’t think about and now I wish I could change it. I could, but I don’t want to remove the 3M adhesive from that hub and replace it.

    Here is a link to the lights at Lowe’s if anyone is interested. https://www.lowes.com/pd/BLACK-DECKER-5-Bar-LED-Under-Cabinet-Lighting-Kit-Cool-White-5-Pack-9-in-Plug-in-Light-Bar/1000332145

  • Workspace Setup & Tool Shopping

    Workspace Setup & Tool Shopping

    When it comes to tools, you could often call me a tool nerd. I spend a lot of my time perusing the local Harbor Freight, Lowe’s, and Home Depot looking at the different tools. I also spend time looking at more quality tool outlets online such as Festool and Woodpecker (yes I do more woodworking than machining right now.).

    I also have a really nice workspace already setup. Like I mentioned earlier, I do quite a bit of wood working and I’ve got a 4′ x 8′ table (two sheets of plywood glued together so it’s super sturdy) as well as a rolling 2’x4′ table that I use for my miter saw, and for assembly. And this is all in a 3-car garage that is slightly bigger than a standard 3-car garage. It has the two car slots at a slight angle to the single car slot, so I have two extra little triangles of space. It’s just shy of 1000 sq. ft. so I’m very happy about the space I have to build this in. My wife will be able to keep her parking spot while I get the space I need to build! (or at least I hope I get the space I need! Happy wife, happy life!)

    I started at the normal place for information, Van’s website. They have a full list of tools that they recommend for the build, which also includes some specialty tools for certain models, of which the RV-10 is a member of.

    Van’s Aircraft Tool Recommendation Site

    They also had a list of companies that you could work with to get these tools. The one shown the most, and one that I’ve seen the Plane Lady mention quite a bit in her videos, is Cleaveland Tools. They had a well maintained website and a set of curated videos going over the tools that you would need to choose between. They have the majority of the tools that you will need for this build in my opinion, all except for a pneumatic Cleco tool, which I feel I will need down the road. But I think I might just get a few extra of the Cleco pliers and have the kids help me out with installing these things. A family that builds together, stays together! LOL

    I put the items that they recommend for the RV-10 build in my shopping cart and made a few additions. One was the 2.5″ flange-nose pneumatic yoke for some of the tight areas that the Plane Lady mentioned in her videos. I also chose to use just the C-frame dimpler rather than the compression dimpler. I’ve watched a few reviews of these tools and it seems like people are torn between the two and no appreciable difference can be shown as to why I should spend so much on the compression dimpler. That’s why I decided to get the C-frame. Plus it will give my kids some time building their muscles swinging a hammer doing the dimpling with me 🙂

    In total, with shipping and taxes, those tools are going to cost me $3250 to get, which is almost as much as the empennage kit. But, I am always of the mindset that you get what you pay for. If you cheap out on a tool, it’s more than likely going to do a cheap job, which I prefer to not do if I can help it. I’m still going to hold off on the tool purchase for now until I can talk with the local EAA chapter about what they would recommend tool wise, but at least this would give me a good ball park of what to expect.

    Finally, I know I will need to upgrade the lighting in my garage. I upgraded it some when I first moved in, as they thought two 60-watt bulbs for a nearly 1000 sq. ft. garage would be sufficient…. I bought two florescent fixture kits that provide 5000 lumen each. But little did I know how little 5000 lumen is for such a large area. I struggle at night to work out in the garage on my wood working projects, at least if I’m not close to the fixtures. With that problem in mind, I’ve planned a few things. I plan to do the following to the garage:

    I hope to get these installed soon and I’ll post the process here. Here is the garage in it’s current incarnation.

  • GTN650 or 750?

    GTN650 or 750?

    I’m well versed in the world of the GTN650 as it has been the main platform for almost half of my small amount of hours. It makes up for roughly 75 hours of my flight time, where the other half has mostly been spent in the G1000 series cockpits. I have a little bit of training with the 430, but that really is only about 3 hours in total if I remember correctly. So having a decent screen has been most of my experience in flying.

    I had seen most of the guys use the two or three panel combo of the G3X or some other vendor in conjunction with a GTN650. I had contemplated for a while, why don’t I just use a GTN750 instead? I could get my approach plates on the moving map which would make flying IFR even that much easier, rather than having to look down at ForeFlight and see where I was in relation to the approach chart there.

    I decided to specifically look up that topic as I imagined that there were quite a few people who had made that comparison, considering they are very similar platforms. Garmin actually made a really good write up entitled Stay in Touch with GTN: Differences Between GTN 650 and GTN 750

    In this article they discuss the main issue I had with the GTN650, which was the ability for it to display both NAV and COMM radios frequencies, where the GTN650 only displays one set at a time and you have to toggle between them using the push functionality of the knobs on the bottom right. Many a time I’ve forgotten to check the NAV frequency and put it to the active when loading and activating an approach. I would prefer that to not be a problem, granted that should just be a habit change for me to push that nob to check it, but it’s just easier to look over and see it without having to take your hands off of the controls and push the knob especially if you are in real IFR conditions and possibly getting close to task saturation already.

    I do like the feature provided in the GTN750 platform of having the approach chart on the moving map. Granted, this isn’t super critical if you load the full approach as it will show you the entire path you should fly on the map. I still like to have the chart up to reference items, though if you are coming in on the approach from the top of the chart, it will display upside down, which probably won’t benefit me in the long run LOL

    I also like that the GTN750 integrates natively with the audio panel if you have their specific model installed. I prefer simplicity and if I can get one panel to run the entire plane with another panel in the middle for all of the navigation, weather, and approach information, that would be best.

    On top of these differences, which really aren’t that many, the cost is one thing that is helping me make this decision. The GTN750 is $5,500 more than the GTN650, where a G3X is only $3900 in total. And going back to my mantra of simplicity is better, I can control everything through the G3X, whereas the GTN750 would only be able to control the transponder and the audio panel. I want my secondary NAV/COMM, engine instruments, as well as my autopilot integrated as well.

    Now to just plan out how I’m going to put these three panels together. I really like Good Plane Living’s idea so that I can have the same control instruments on both the pilot and passenger side, with the engine and navigation/weather related information on the middle panel. The only thing I might skip is having the physical autopilot controls on the panel. Something similar to what you see below just without the autopilot.

    Or, possibly this scenario to give me more room below the middle panel. I like the idea of having that storage in the front middle console for things like sunglasses, wallet (which I hate having in my pocket so it usually comes out with I drive/fly) and then have the center console for things like maps, audio panel hookups, manuals, etc. I think I like this option better.

  • Additional Panel Setup Research

    Additional Panel Setup Research

    While I’m waiting for this lockdown to conclude, I’m really just continuing my research. I wanted to discuss the build with my local EAA chapter here in Oklahoma City before I made the purchase of the empennage kit which would need to include tools as well. I’m hoping they will have some good insight, tips to share, and recommendations. So, in my continued research, I am most interested in the panel setup and the avionics, which is something I’ll be using quite a bit of during flight both in VFR and IFR conditions.

    I don’t want to call any companies and get them riled up or waste their time on how to set up my panel, but the Garmin setup looks very fascinating! They have so many backend modules that integrate with the G3X and it reminds me very much of the days of my private pilot training using the G1000. I’m very impressed by the Garmin G3X Autopilot system. According to the literature I’ve read, the additional components you would buy are the smart servos for either the roll, roll/pitch, and roll/pitch/yaw configuration you desire and it will integrate with the system. You then access all of the controls through that panel.

    I’m also interested in the ESP (not telepathy, lol but it stands for Electronic Stability and Protection. It allows the system to protect you from going beyond your airplanes operating envelope. Their video explains it better than I can, but it works in both the roll and pitch categories to keep you from over banking or stalling/overspeeding the aircraft.

    Garmin ESP Overview

    I will say I’m torn about weather to get a GTN650 and have a third G3X panel for viewing weather, etc, or if I should go with a GTN750. The only thing that has ever bugged me about the GTN650 is not being able to see my COMM and NAV radios at the same time. It takes longer to make sure I’m listening to the right NAV frequency and actually caused me some issues during training where I kept forgetting to make the frequency active when I would load an approach because I would just forget about it. Out of sight, out of mind. But I’m not sure if it’s worth the additional cost to do that and not have as big of a screen. Still looking into that as I might be able to see both the COMM and NAV frequencies on the G3X instead which would fix my one and only issue with the GTN650 at this time.

    I ran across another RV-10 builder’s log this week as well. I couldn’t find any name to reference, but here is a link to his Blogger site:

    http://buildingrv10.blogspot.com/2018/02/a-tour-of-rv-10.html

    He had an excellent setup as well that was more focused on his side of the plane and only used two G3X panels. I think that would put the GTN650 further out of reach than I would like, but if all of the functionality of the GTN650 is available through the G3X it might not matter. His panel was very clean though. Here are some pictures of it.

    Pilot seat view of the panel setup
    Passenger seat view of the panel setup

    I would have saved room on my panel by removing the autopilot controls, but it is still very slick. I like that he has a tertiary attitude indicator, but maybe that’s overkill? I need to see if both of the G3X’s rely on the same source for attitude information. If that’s the case then having a cheaper standby would be good to have in the event of an AHRS failure.

    Here are some more pictures of his panel with everything up and running.

    Pilot seat view of panel with all avionics on
    Center panel view

    I hope to get a good setup mocked up in some visual format. Again, having something to admire and drive to gives me the most motivation so I want to have alot of visual help to keep me going 🙂

  • Avionics & Panel Setup Research

    Avionics & Panel Setup Research

    I will say, this has been the most worrying part of this whole project in my mind. They don’t tell you much about how all of these systems interconnect when you are taking classes for your private pilot and your instrument rating and I’ve never looked under a panel to see how it’s all done. So not having a frame of reference makes this a little scary. I work in IT so I don’t believe I’m going to have problems figuring all of this out.

    I did a quick Google search for RV-10 avionics and panel setups and it brought up this really awesome video that Good Plane Living did covering how he setup his panel.

    Good Plane Living – RV10 Panel Tour

    I love how this whole thing is organized. He has his emergency related buttons in a small section on the left side of the PFD, flight related buttons are underneath the PFD, some accessories and what not underneath the MFD, and then he has all of his lighting on the ceiling of the cockpit next to the map lights and vents. Very well organized panel. I really like the center console controls as well. It’s a very natural position for anyone to have their right hand and is very much like a modern car.

    He had some interesting lighting that I had never thought of doing before. He has foot well lighting. It is in red so that it won’t ruin your night vision. He also has the normal map lights for both front and back. He also has a dimming switch in the front for the rear lights. That will allow you to disable the rear lights even if they turn them on if you don’t want to ruin your night vision.

    He has this all installed in an Aerosport Products RV-10 310 Panel system. It appears that if you don’t want the carbon fiber look, you do have the option of painting it over? They show a few different installed versions that are colored to match the interior, which is more the way I’m wanting to go.

    Aerosport Products RV-10 310 Panel

    I mentioned the center console throttle, prop, and mixture location earlier, and this product is also provided by Aerosport Products. It is their RV-10 Quad Arm Rest that appears to come in a version you can paint or the carbon fiber. It does not come with the fuel selector location that Good Plane Living has in his video it appears, so might be something to take a look at. I like the position for the fuel selector as it has always been in the floor board or against the left kick panel in previous planes I’ve flown and they’ve been a pain to reach.

    Here are the rest of the avionics he has installed:

    There are other components that are more than likely behind the panel, such as his transponder, AHRS, ADC, and other components. But I’m hoping as we get much further down the road that I will get a chance to talk with an avionics shop to see how best to setup the panel to fit my needs. I love this panel setup and the information it provides him, the only part that he didn’t mention that I love having in my current plane is the FlightStream 210 which interacts with my iPad. I might be able to get rid of a third screen in that panel and just use my iPad, or I could keep it. Decisions that will be made much later on!

  • My First In-person Look

    My First In-person Look

    I posted a request to see if anyone had an RV-10 that we could go see to the Central Oklahoma Aviation Facebook community a week ago when I was continuing my research about the RV-10 model. I had quite a few people let me know that they knew where one was, but they didn’t have any information on the pilots that owned them. I finally had someone that knew the pilot who flew an RV-10 that was very close by. I hit this wonderful gentleman up and he willing to oblige us with a view of his airplane.

    This plane is quite a bit bigger than I had imagined. This thing sits roughly 6’6″ to the top of the cab if I had to guess as it was a bit taller than me and I’m 5’11”. That’s not really a concern for me and is actually a welcome sight as it will have good ground clearance but also have good headroom inside the cockpit. The wingspan reminded me of the more modern Pipers, but was not as wide as the Cessna Cardinal I have partial ownership in right now which is always fun getting it back into the hangar as to not hit the wingtips on the doors.

    The one interesting thing was just how high the tail is from the ground. It is at least close to 4′ off the ground (again, I’m going by references to my own body, so I could be way off. This is my perception of the plane LOL) I’m not saying this is something that will keep someone from building this plane, it was just interesting how high it was.

    The interior of this plane was so nice from a dimensions perspective. It reminded me of the Cardinal on the front seat in being a good width for two people to sit in without having to be scrunched together like we were in the Skyhawk. There was plenty of room for feet both for the front and the back seats. Even the back had a great width to it. The luggage area is accessible from the back seat, even though you will have to probably get up a little bit and get behind the seat, but it is easily doable, just like how it is in my Cardinal.

    It was interesting to have the flight controls as a stick between my knees, as I’ve been so used to the yoke based control coming out of the panel. The panel in this plane, though a little older now, was still super nice! That’s one of the many advantages I’m seeing from doing this build as well. I will be able to get the avionics I want, placed where I want them.

    All in all, I was VERY impressed with this plane and it made me even more excited to order the empennage and start the build! I’ve posted some pictures of this plane that I found online as well as from his build website. you can go to his build website here:

    http://www.wingscc.com/N2GB/

    I’ve posted some awesome pictures of his plane below just in case he takes his site down or whatever.

    At KWVI on Sept. 3 2010
    Oshkosh 2009
    One of the few days with snow in Oklahoma