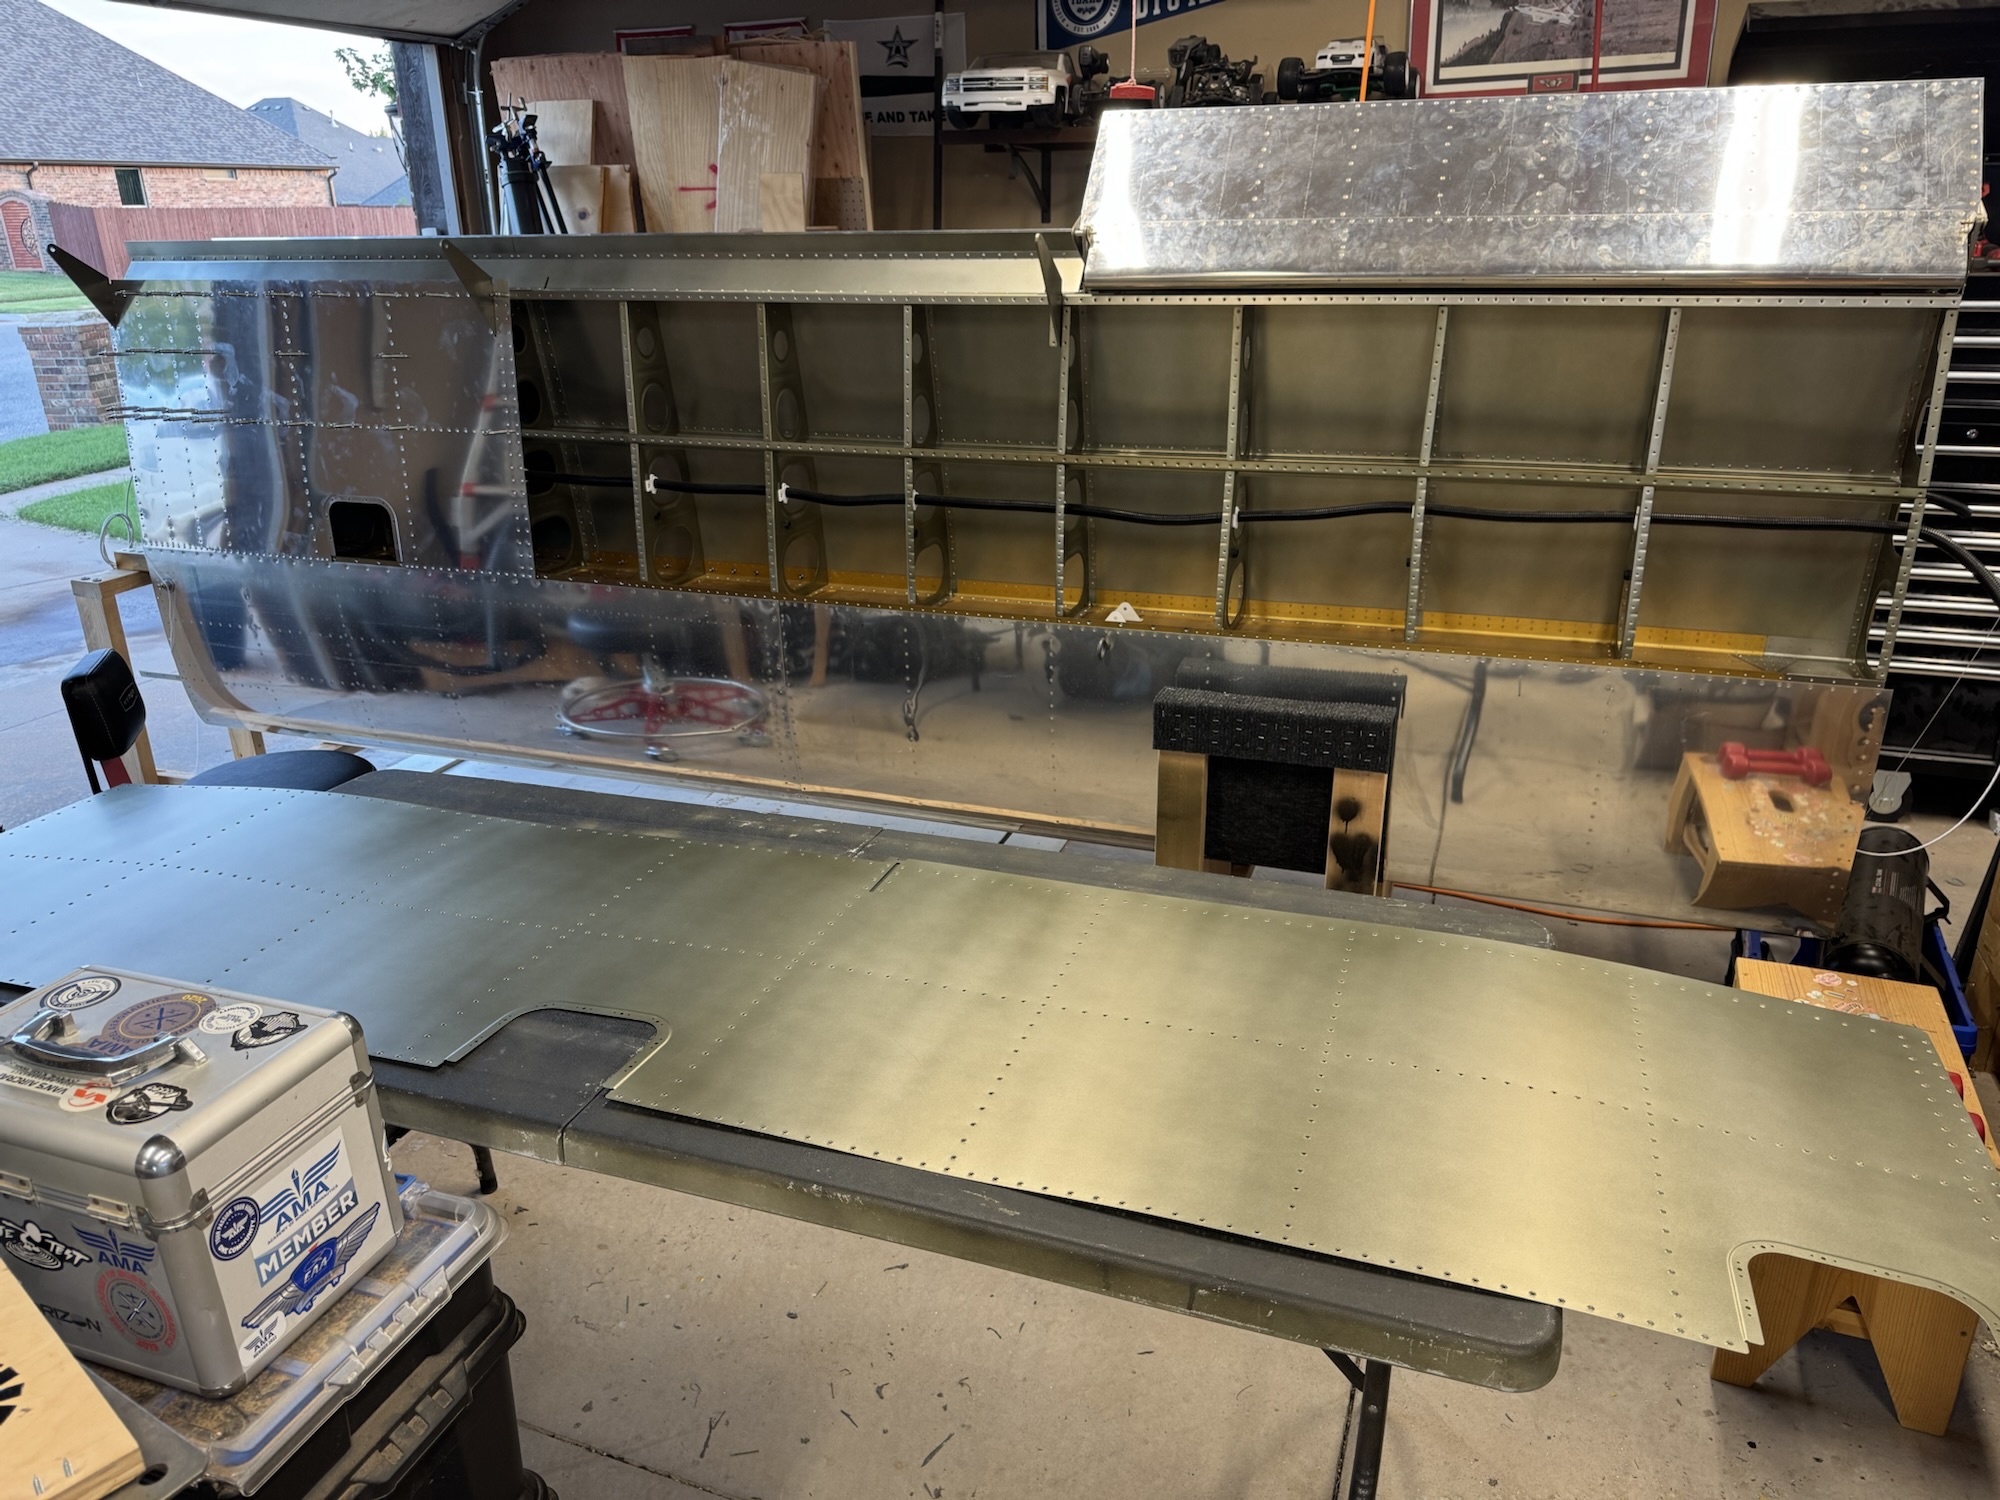
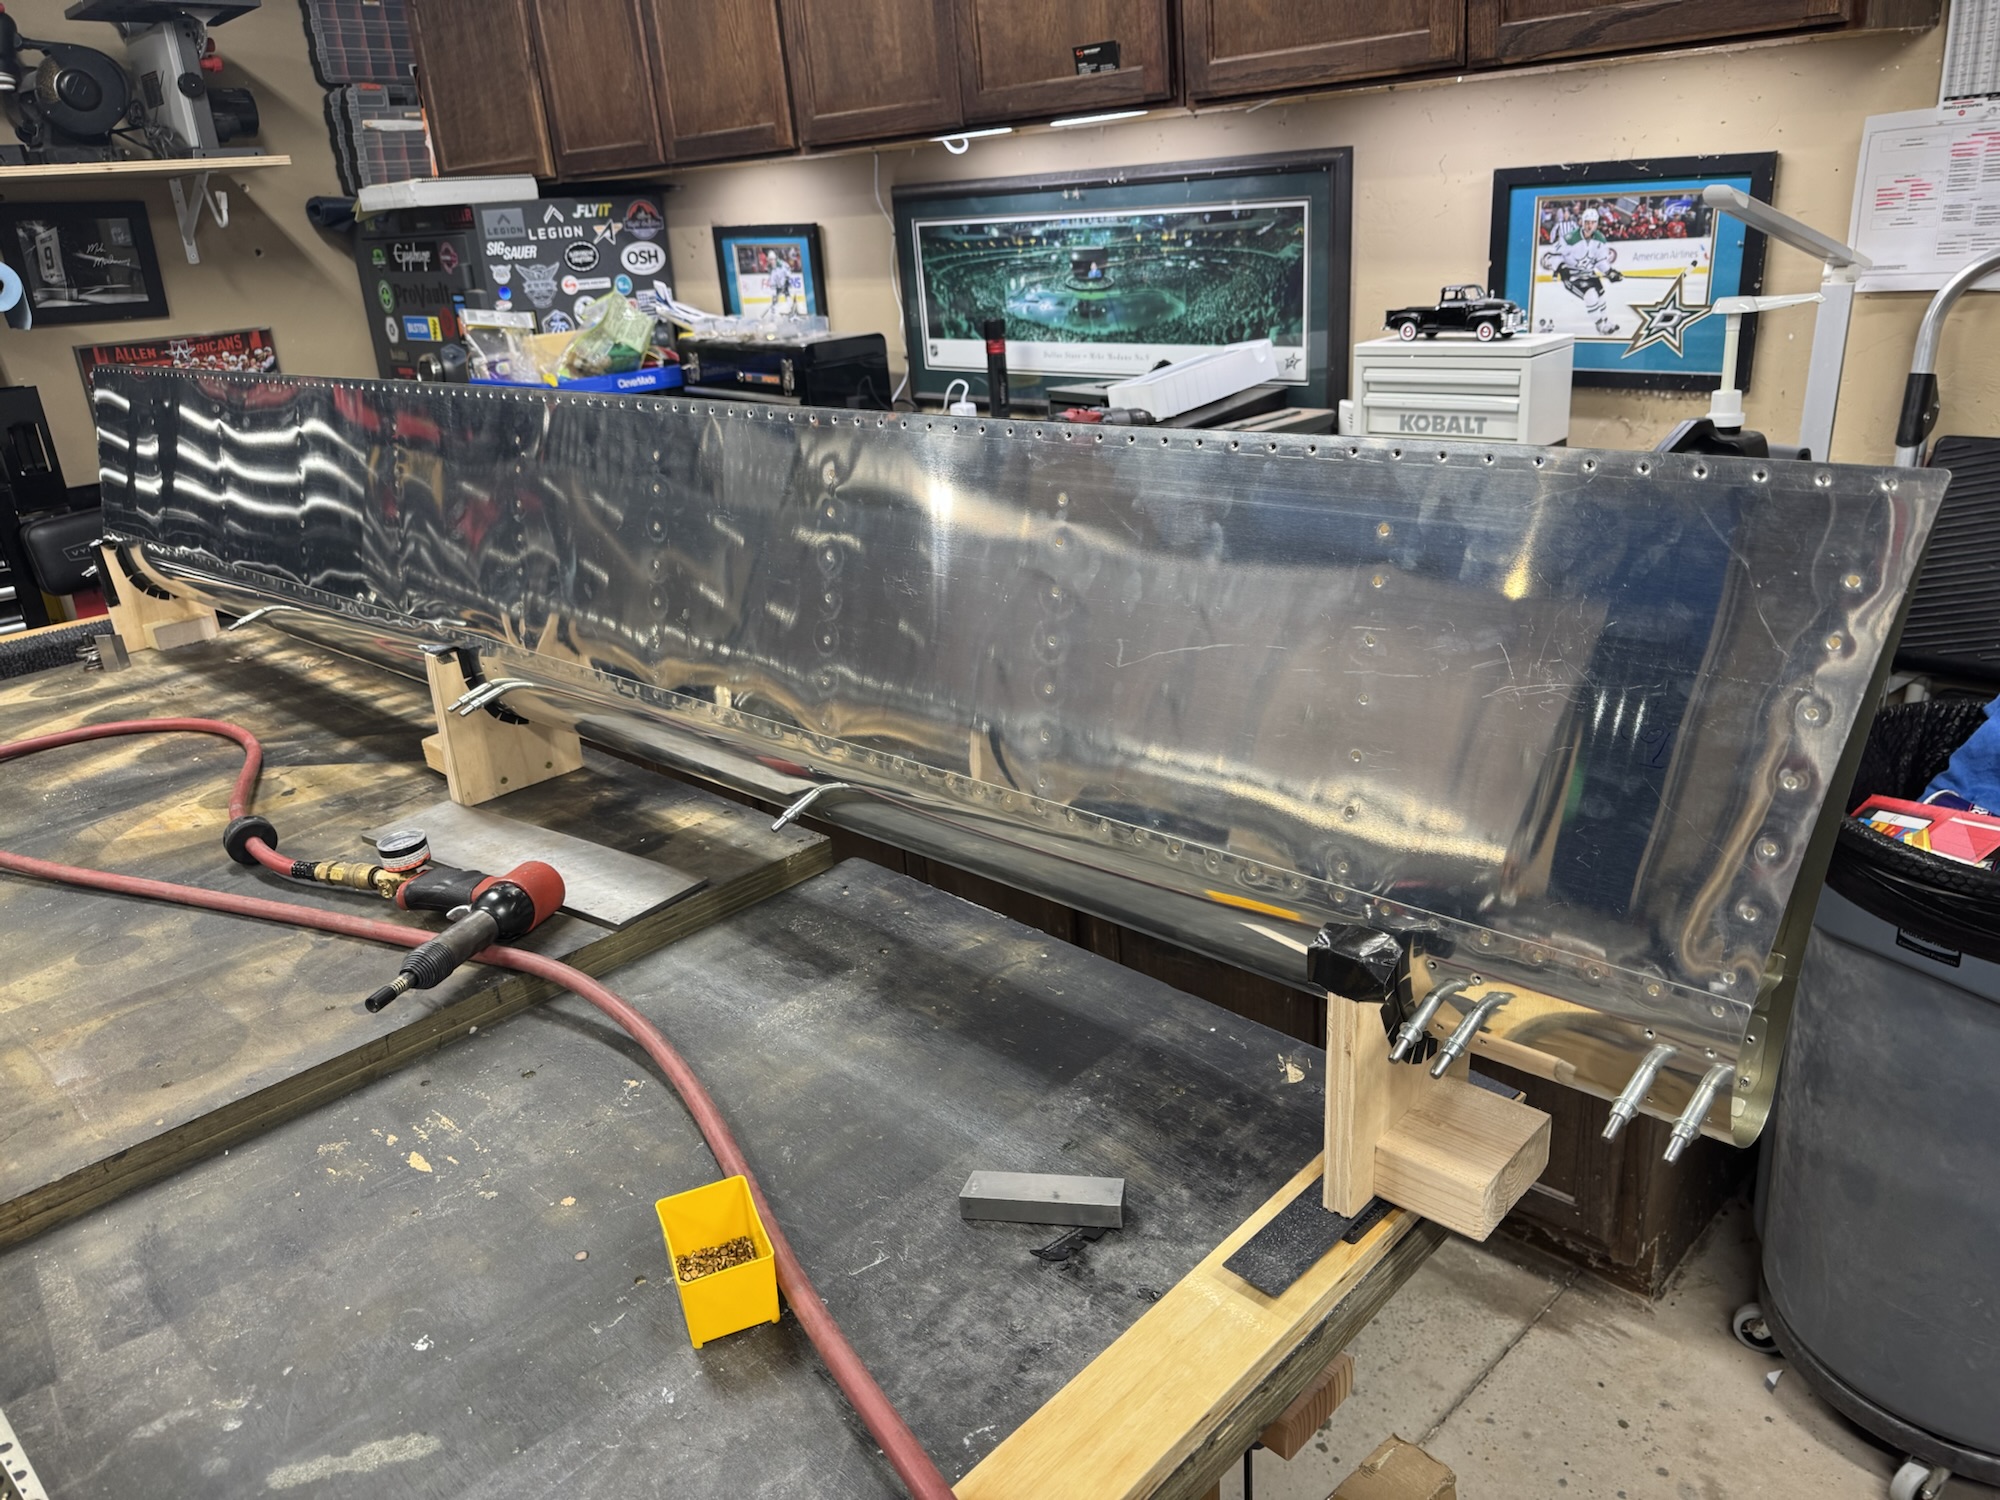
I spent a little bit of time today wrapping up the right inboard skin. I know one thing I am changing on the left wing is that I will remove more clecos to get to the rear spar. That was a very difficult reach to get done the way they described they wanted it done in the manual.
I didn’t get a ton of time as I thought this would take alot more time with two people. But I decided to try it myself and I got fairly good results. I’m not really happy with a couple of my rivets because it is hard for me to determine if my bucking bar is flat with the surface or not. It wasn’t a few times and it actually left a couple of marks in the skin because of it. Luckily this is the bottom side but still I want to do a better job than this. So I might have to have someone else with the rivet gun while I solely focus on bucking. I got almost all of the rear portion of the inboard skin done. As you can see from the yellow rivet tape I am still lacking a few rivets before that section is done.
Alot of work today! The first thing I did today was I went to the storage unit and did an inventory of the seat kit that arrived a few weeks ago. They emailed me one so I could do a proper inventory and I was missing more than I thought I was missing. I sent the list of items I was missing to them so hopefully they will ship those soon. Not like I’m in a huge rush for them but I hate having things hanging because I might forget.
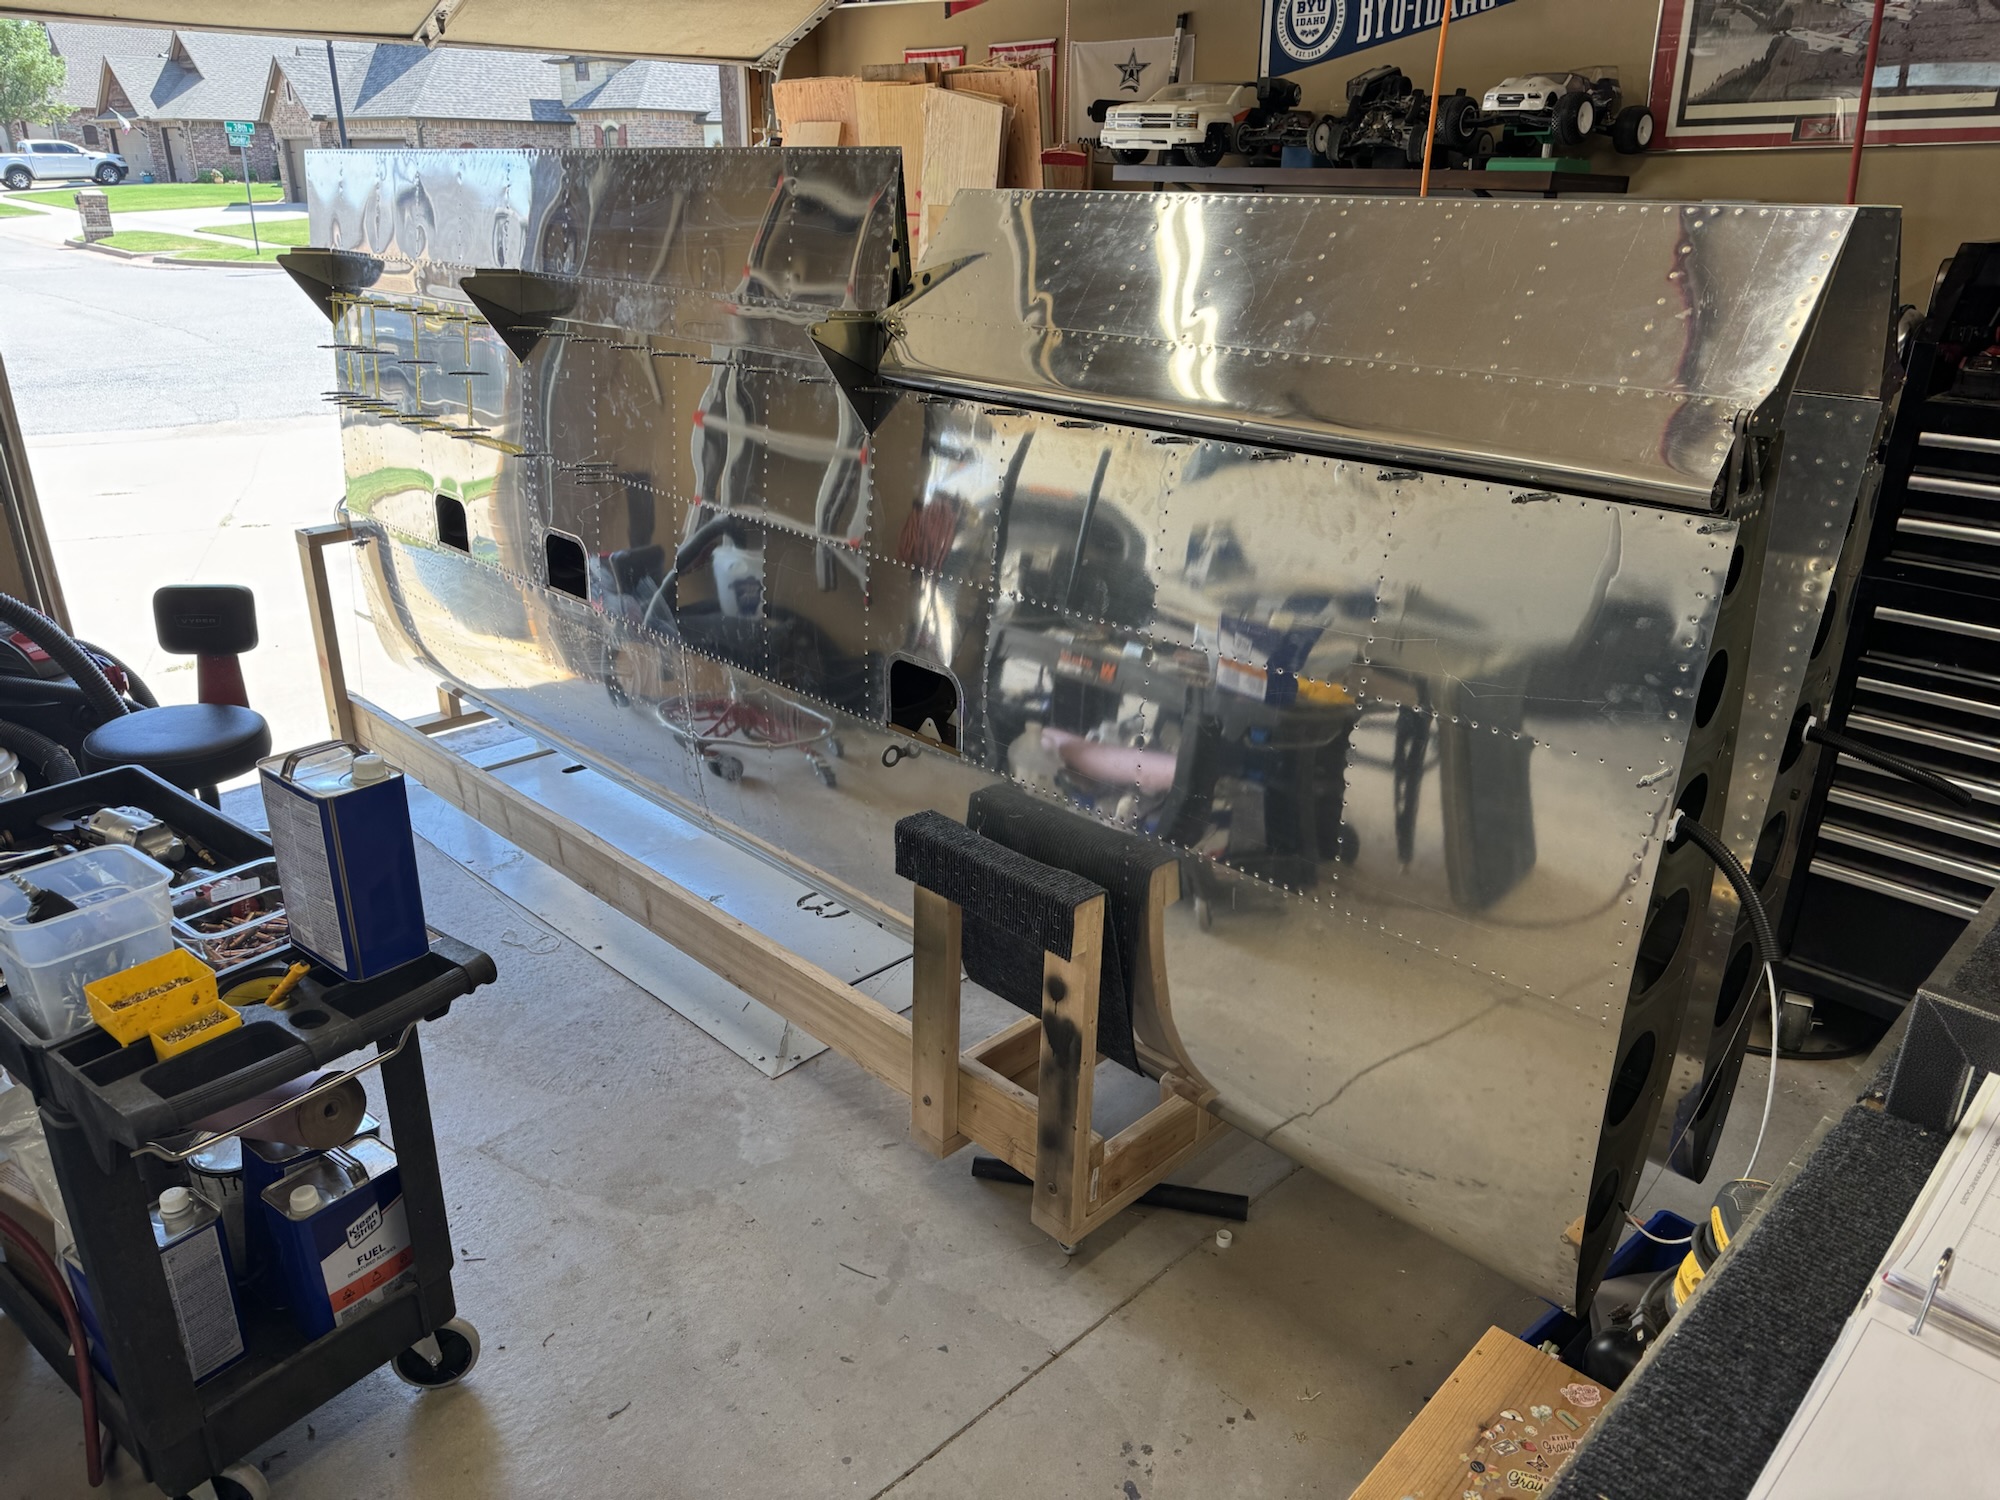
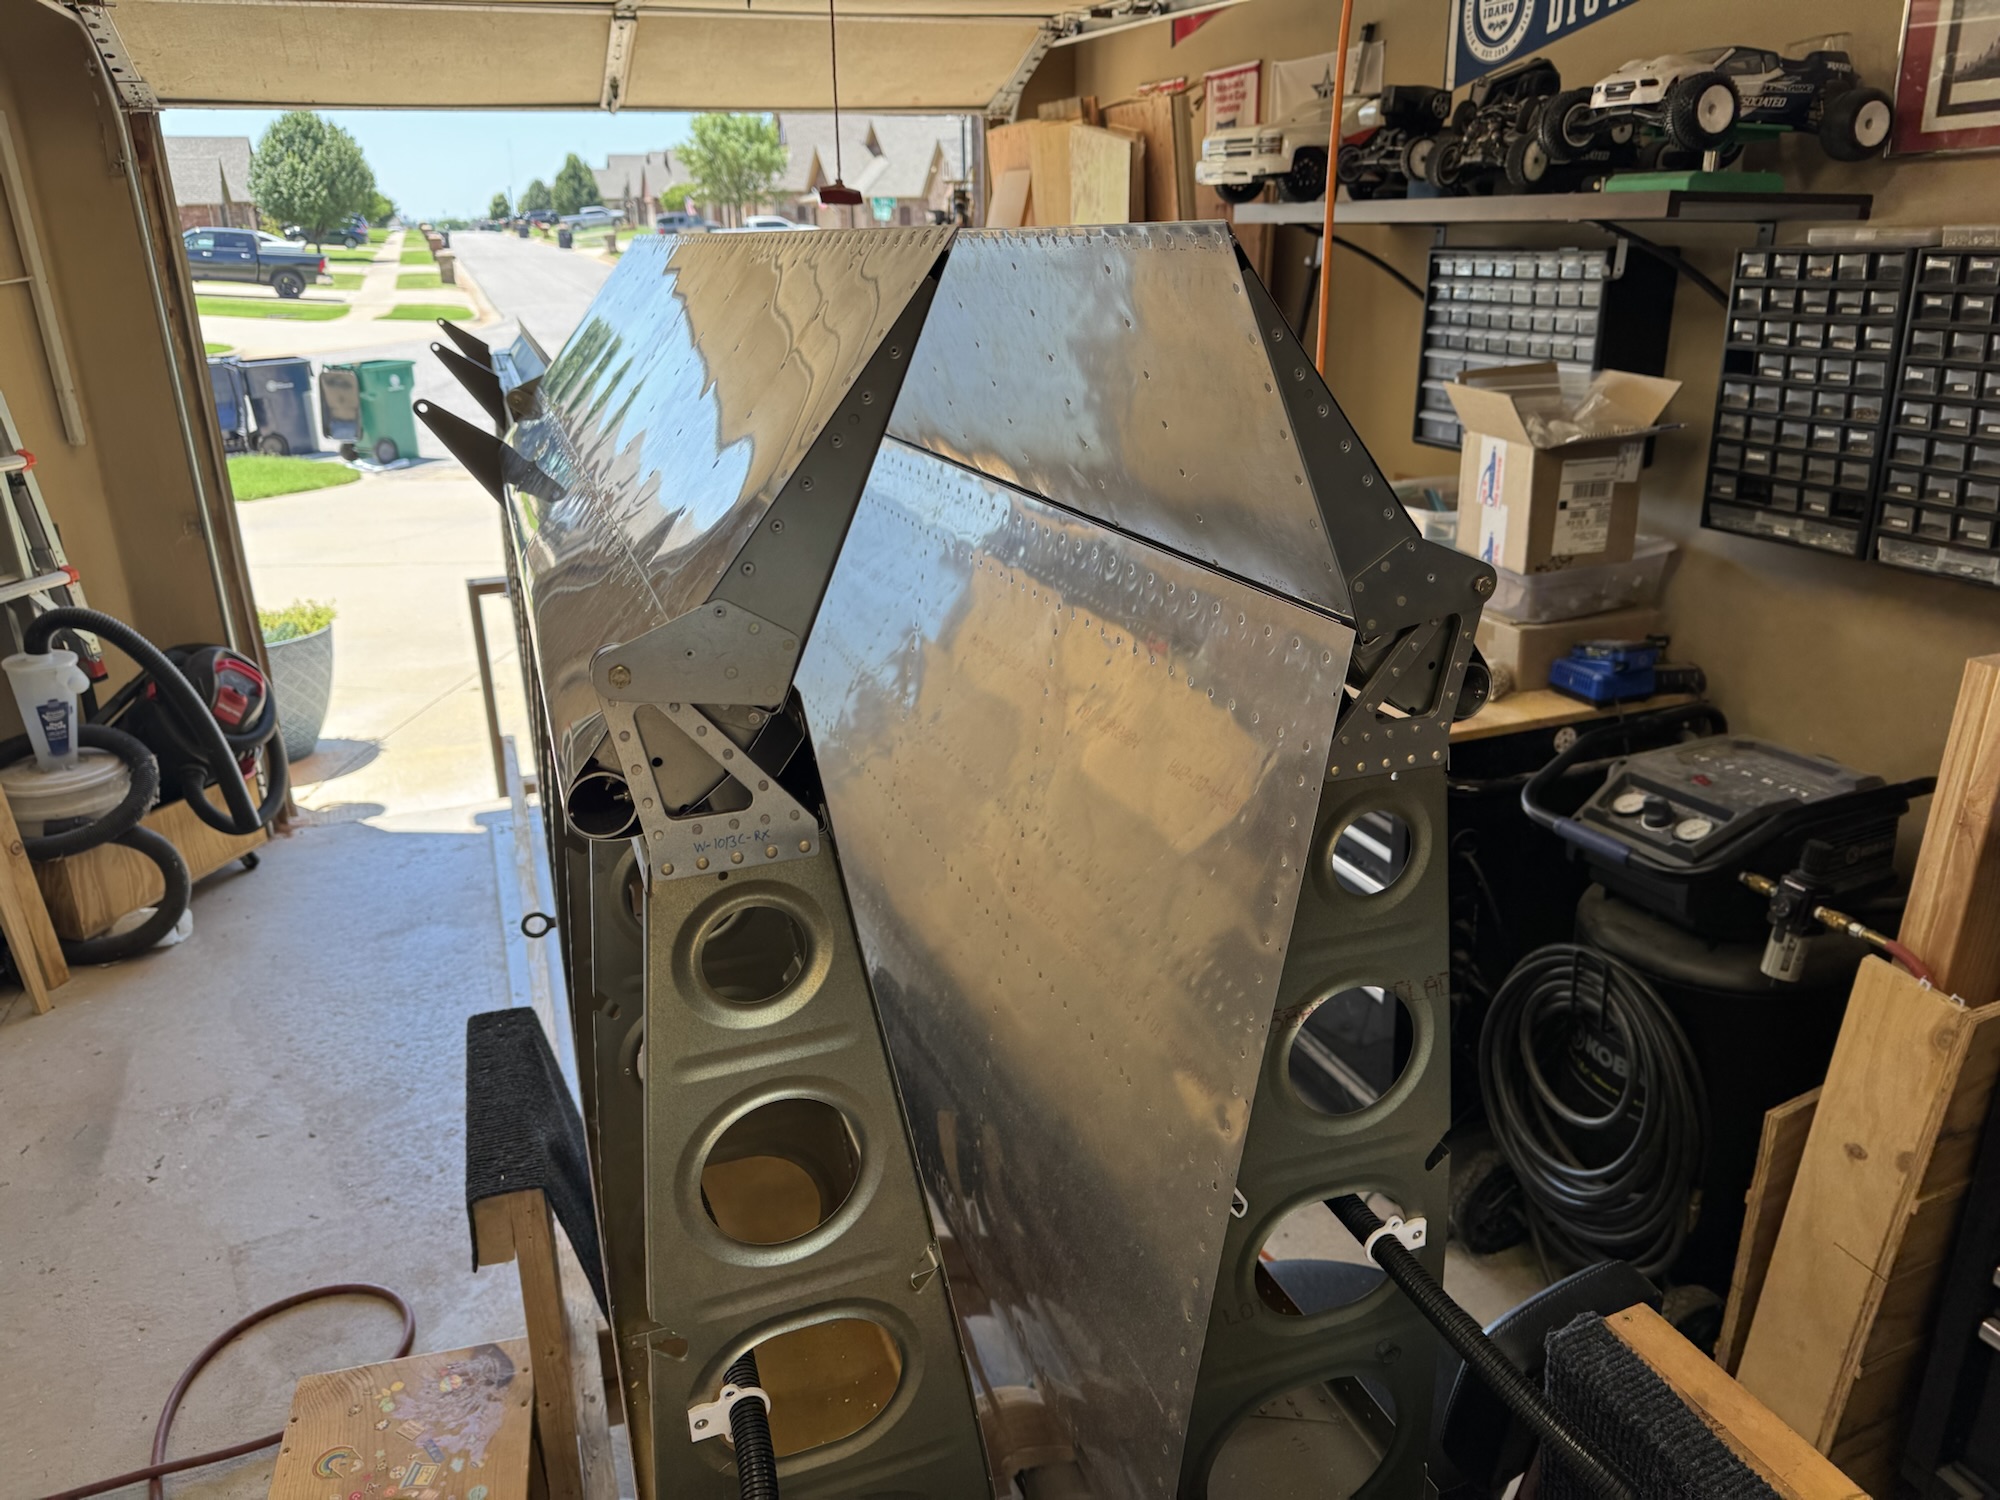
The right wing is ready to be riveted which I’ll start sometime tomorrow. We’re heading to clean the church in the morning so hopefully not too long after that I’ll get started. This will be an interesting job since they are all solid rivets and the skin will be pealed back while I rivet it down one layer of rivets at a time from the rear to the front.
I also drilled the left wing and deburred at least the top of the skins while they were still hanging. But I’m going to wait on those until after I get the right wing done since I don’t have a ton of room to do both of the skins sets at the same time. I also need to figure out how to run the wire out of the conduit down to the pitot tube. Something more to research how to do properly.
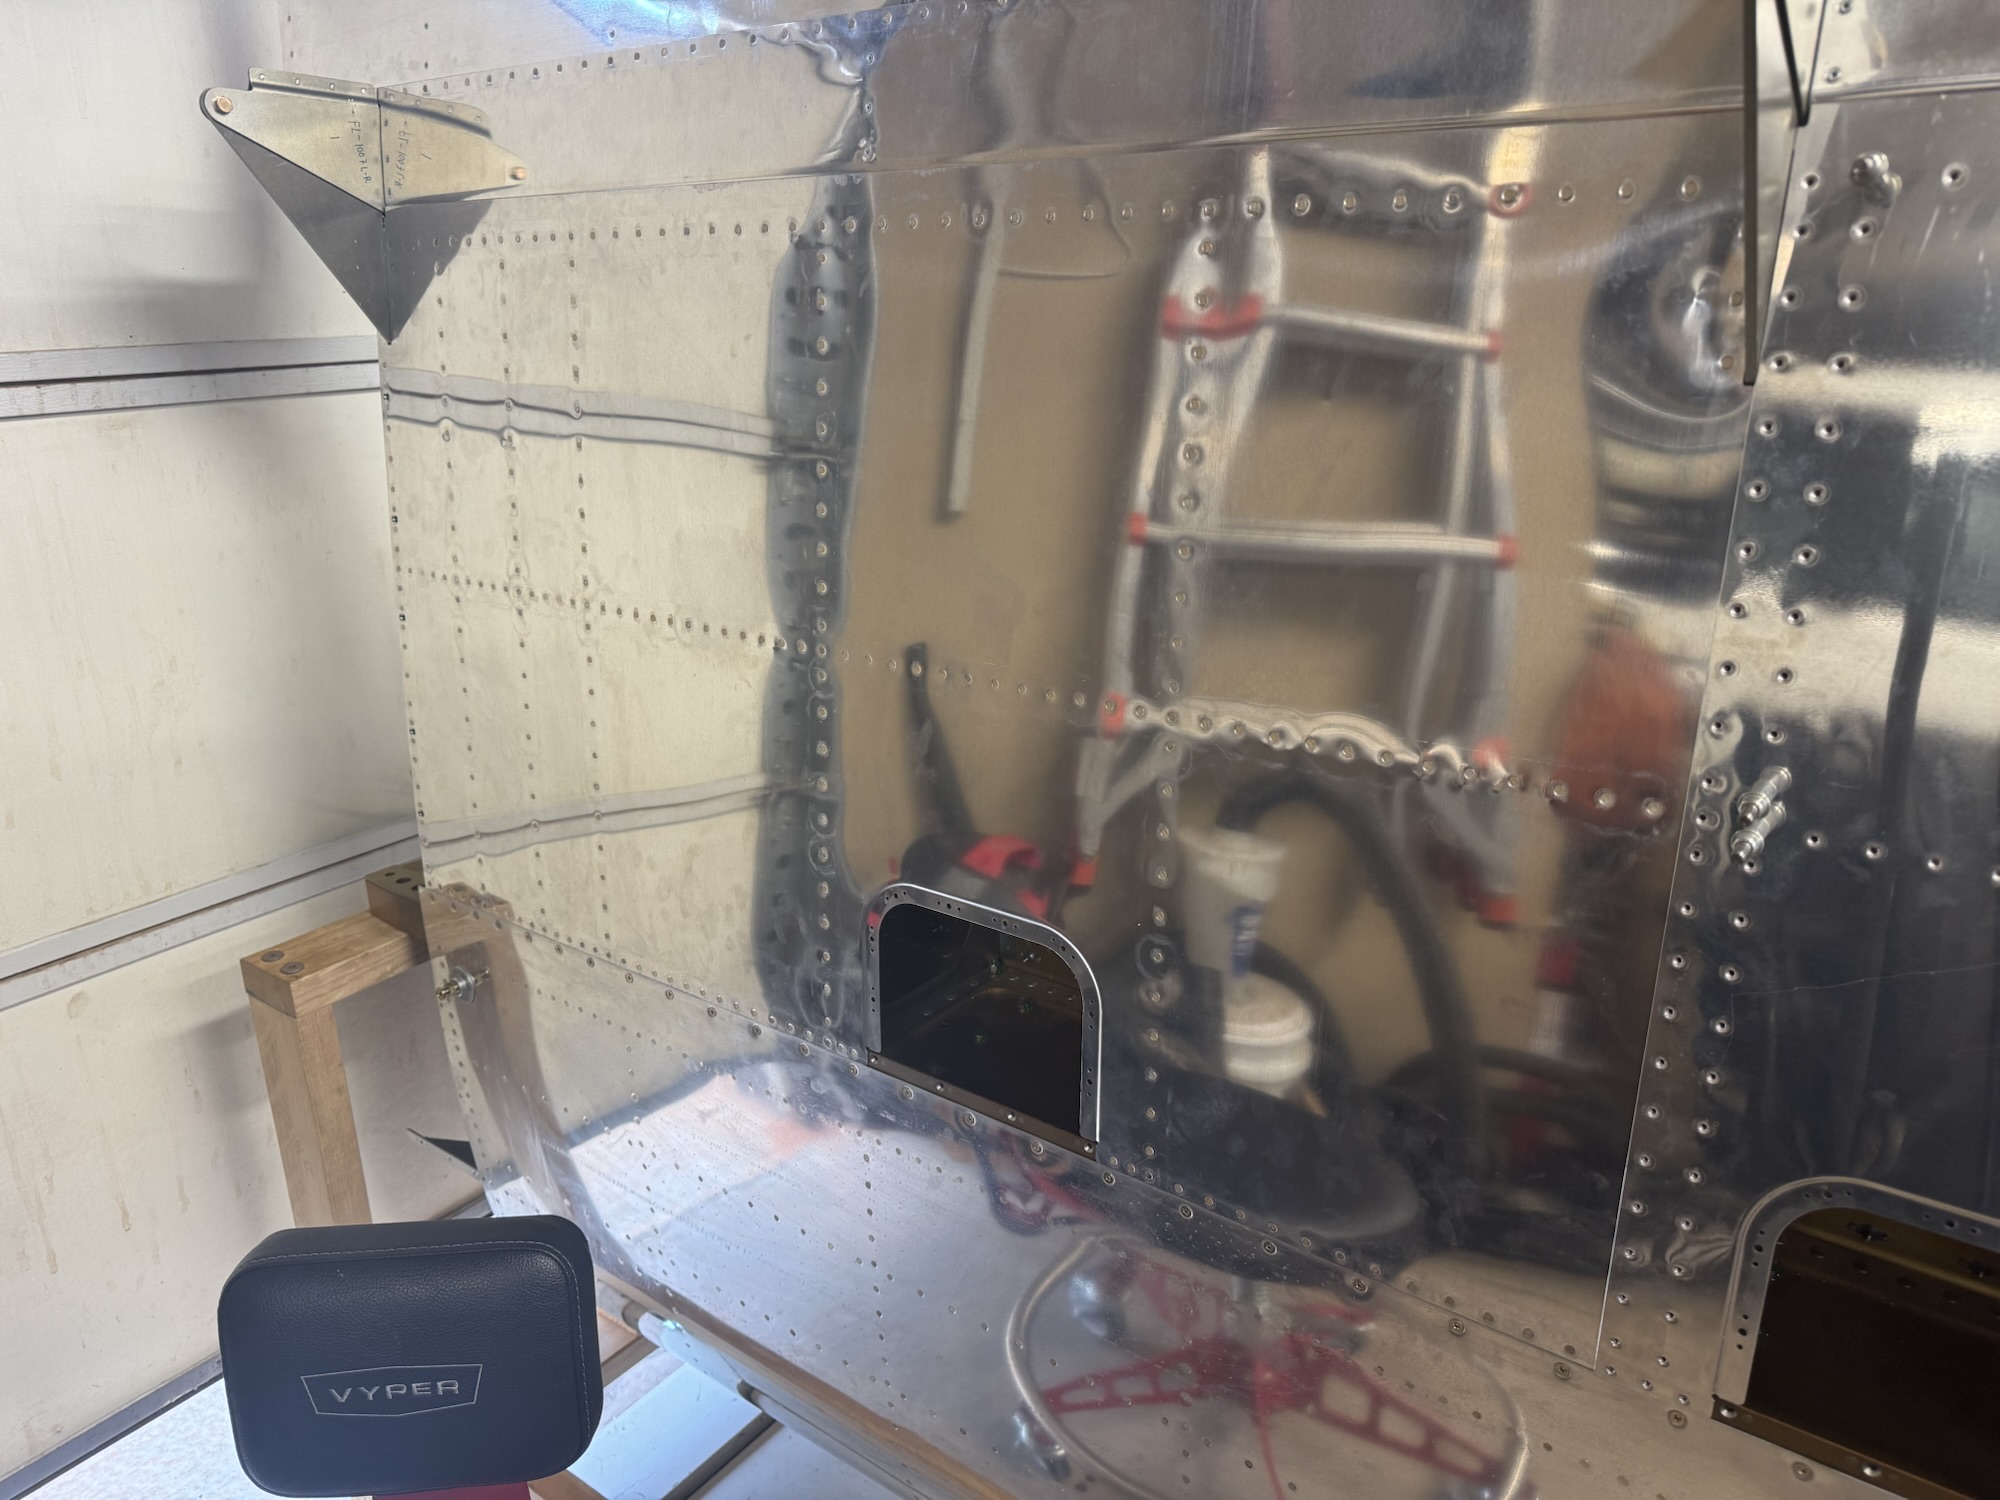
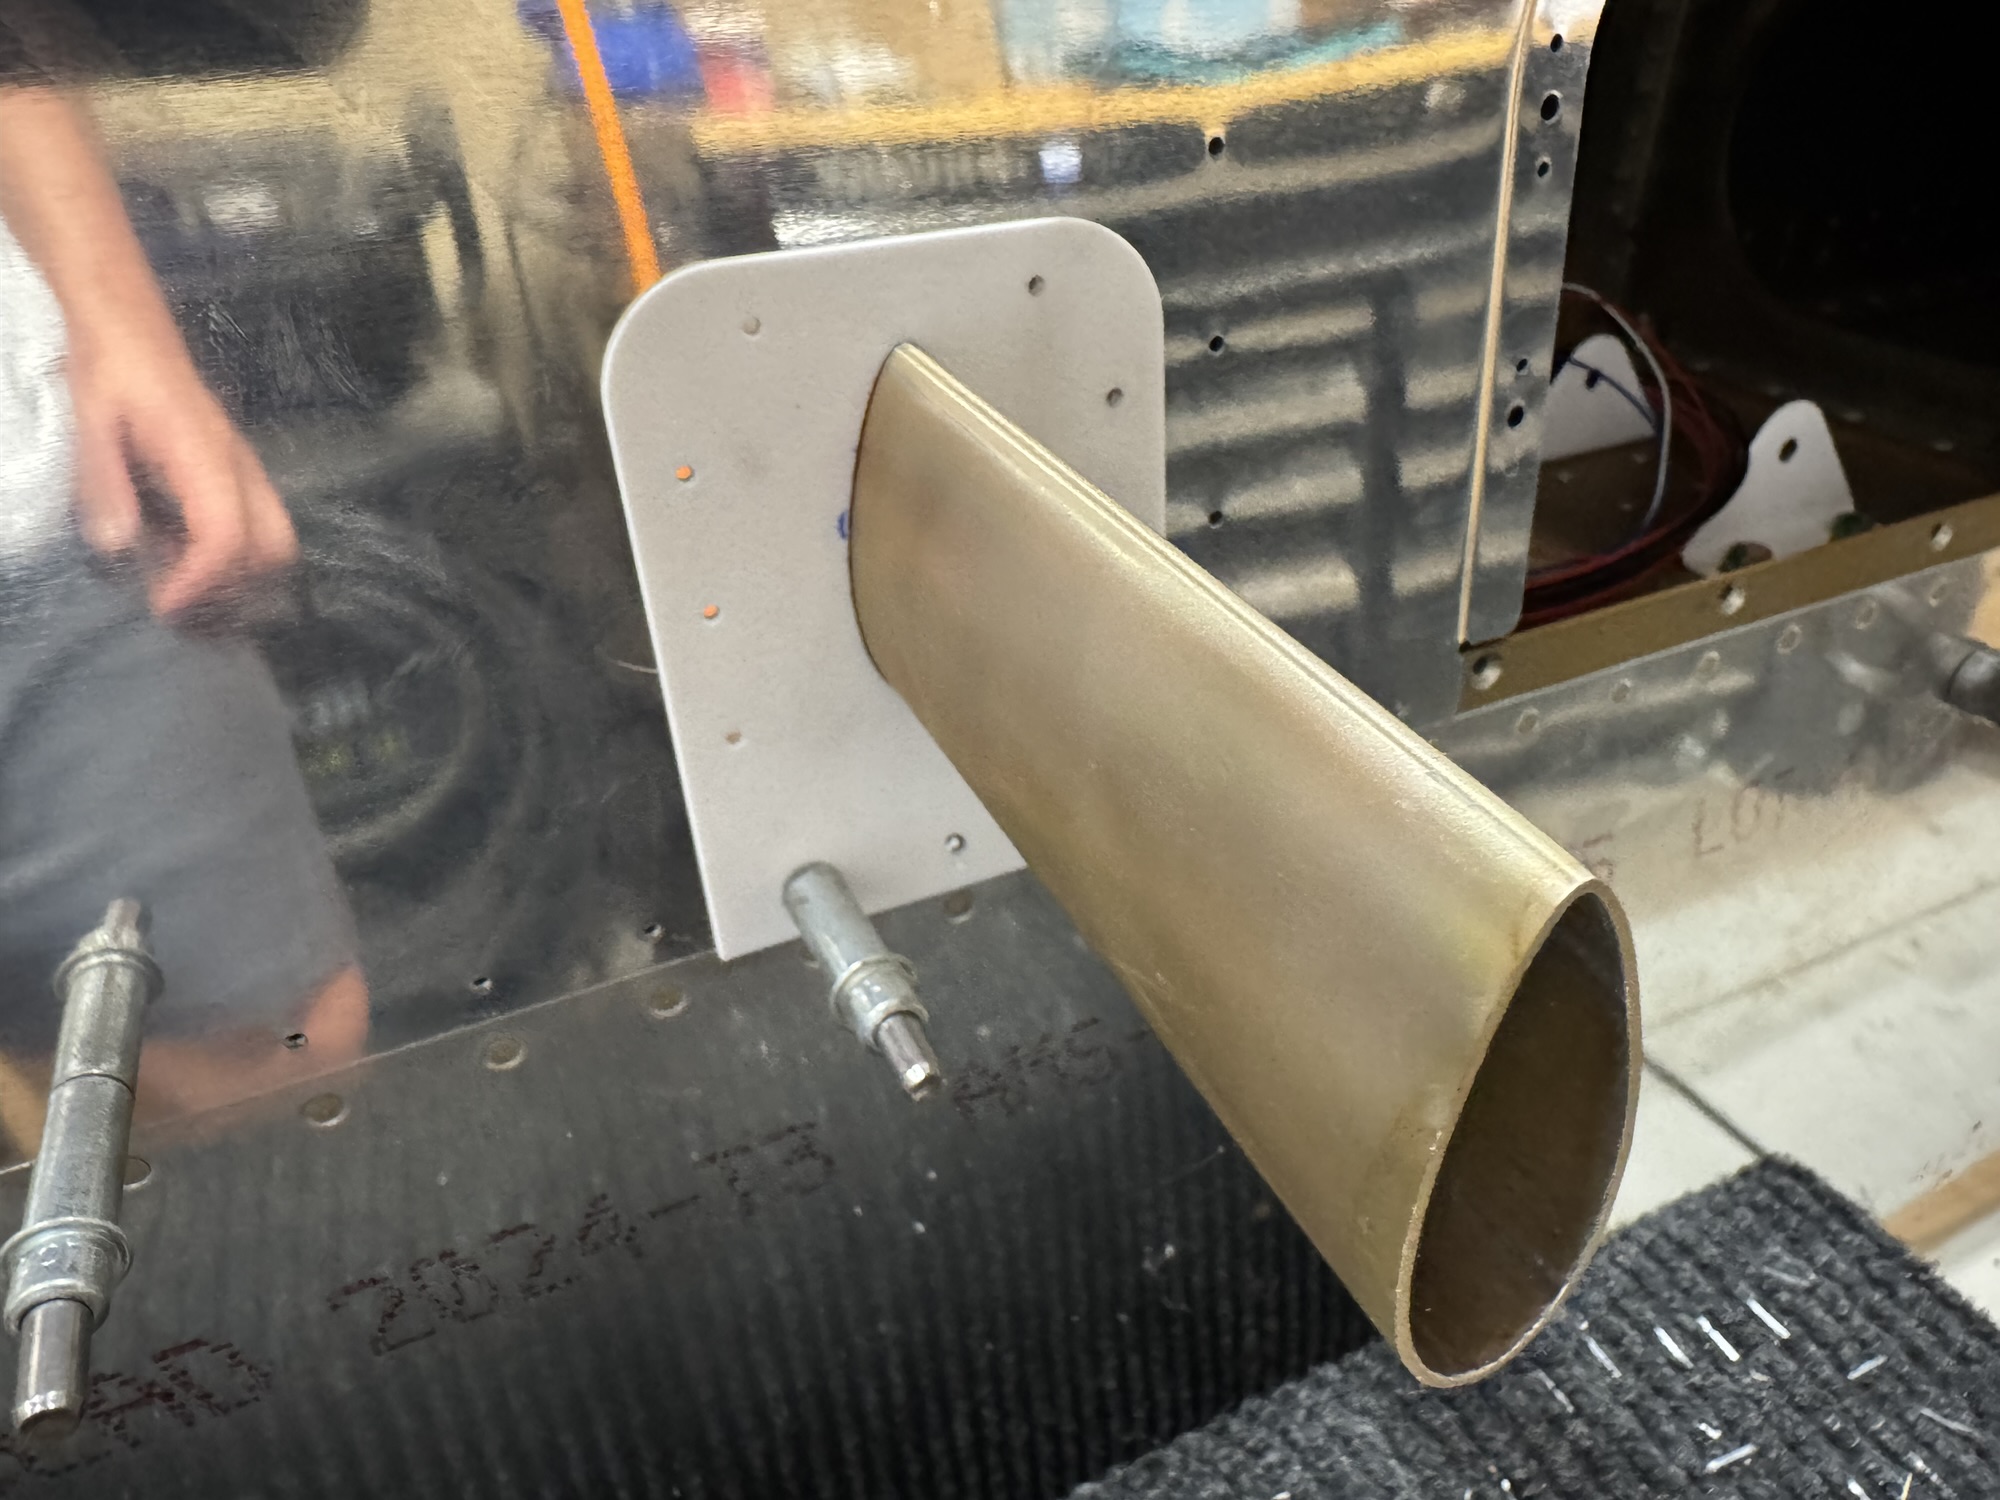
I got the skins out of the attic today with the help of the boys. I got the pitot tube initially drilled along the spar edge and got the side bracket drilled as well. I used the 3D printed template from Allan Glen and it was almost spot on. the three holes along the spar did not match exactly so I had to drill out some of the plastic to make the template work but the rest of the holes are fine since the pitot tube does not come predrilled with any holes. I will get those drilled tomorrow now that I have the skins mounted and can verify they are good to go before removing them, dimpling, deburring, and priming them. I also need to drill the J channel stiffeners in specific areas to match the skin. I would have gotten further along but my network change tonight took way longer than I expected due to unforeseen issues.
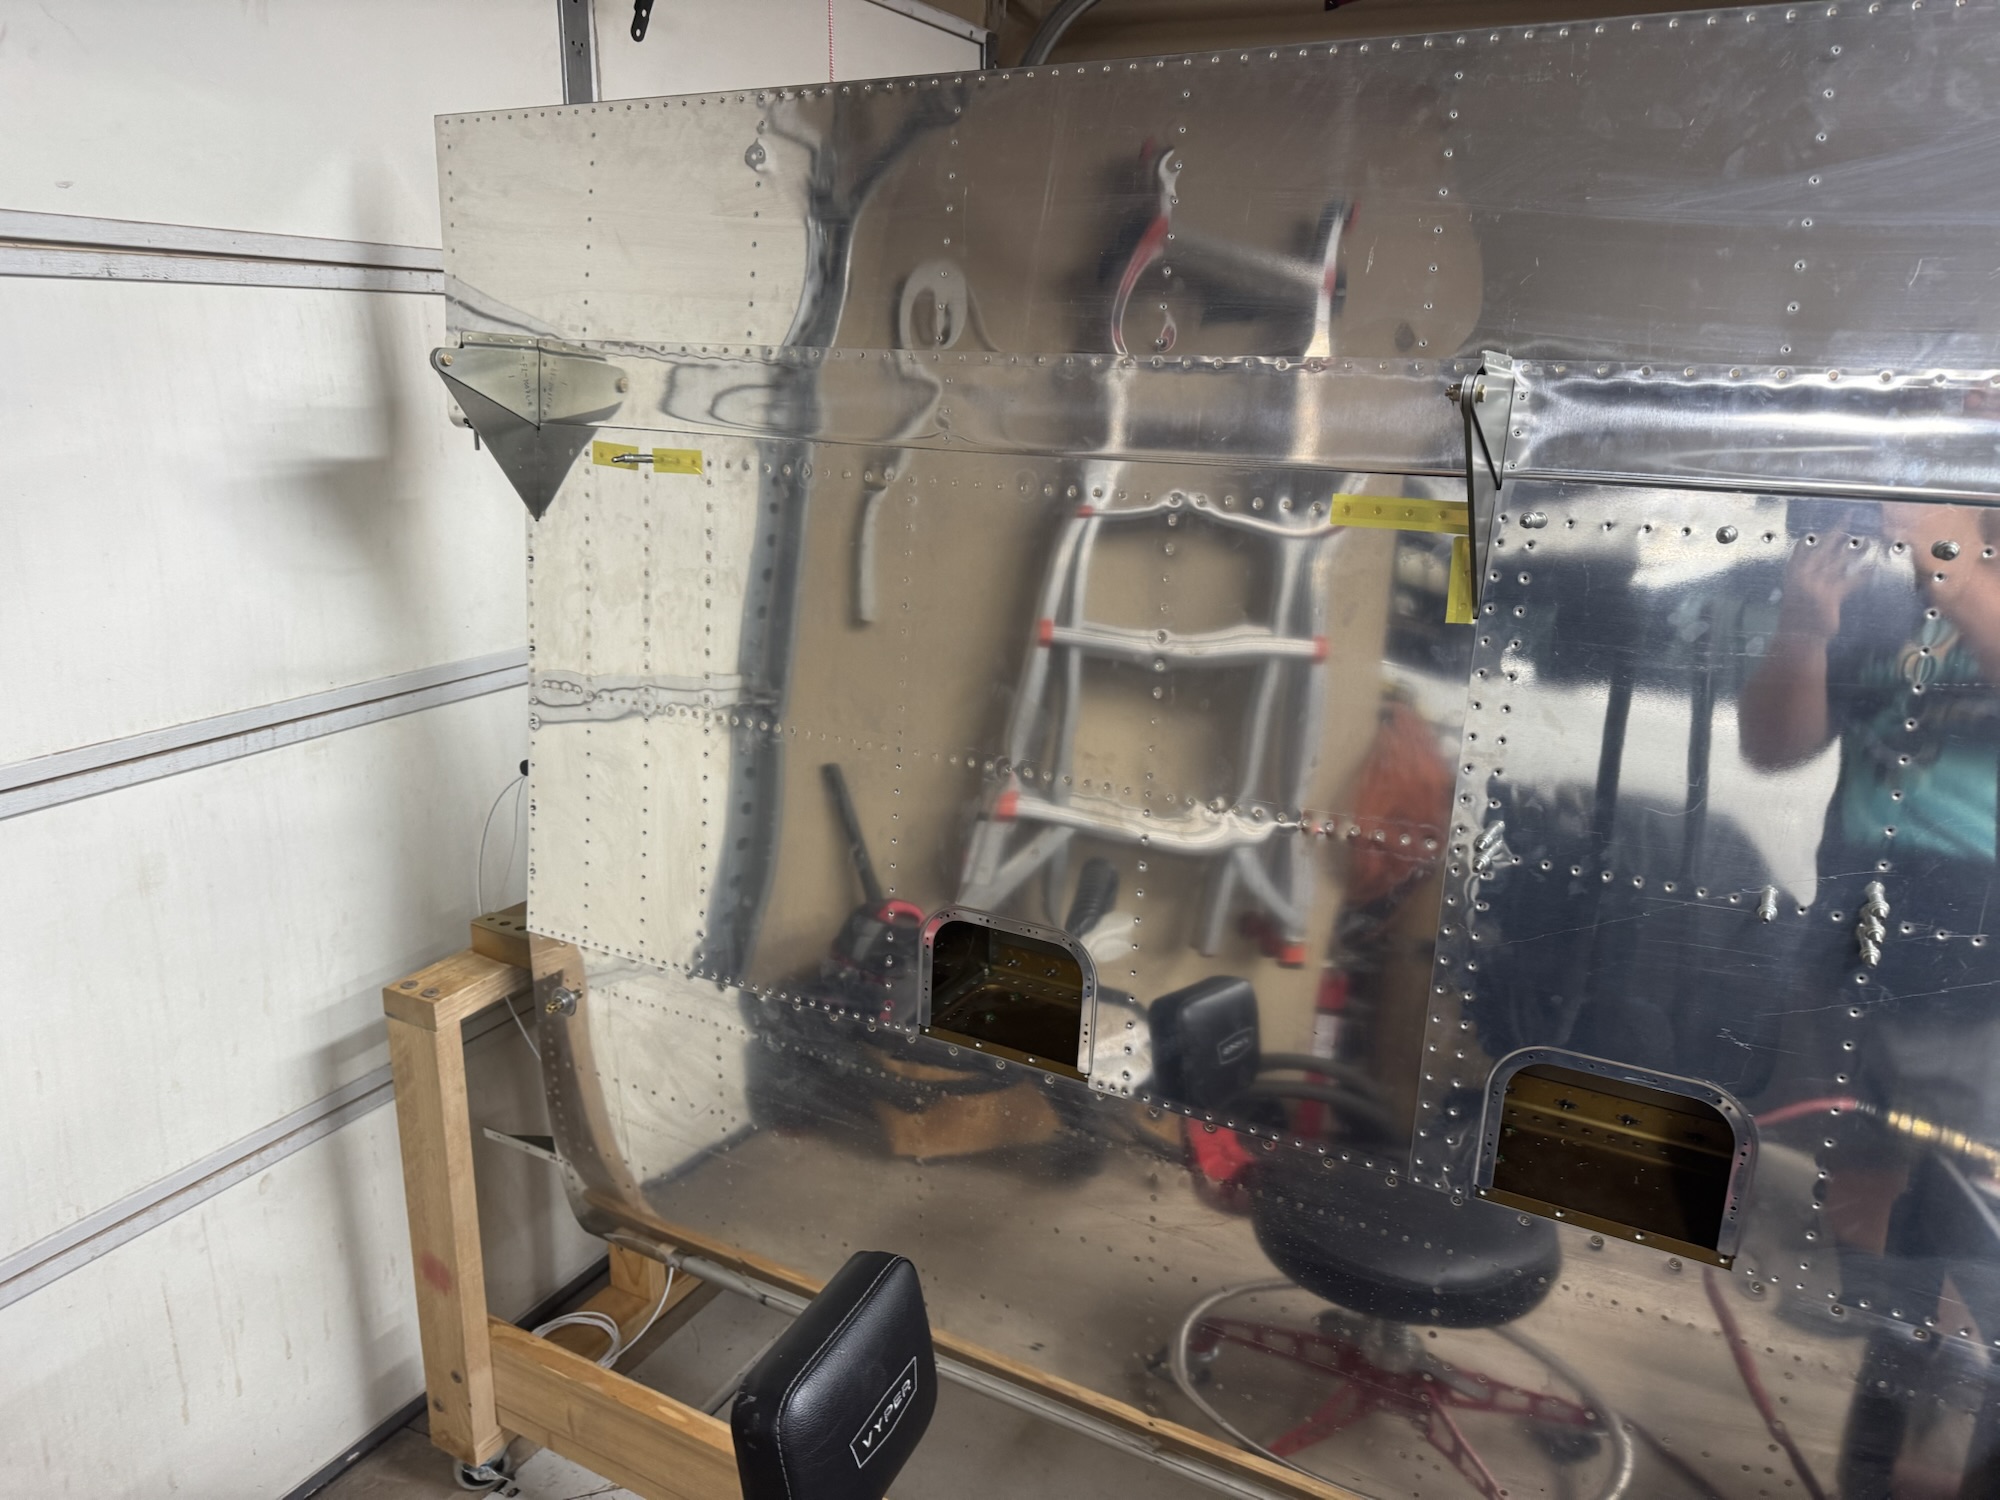
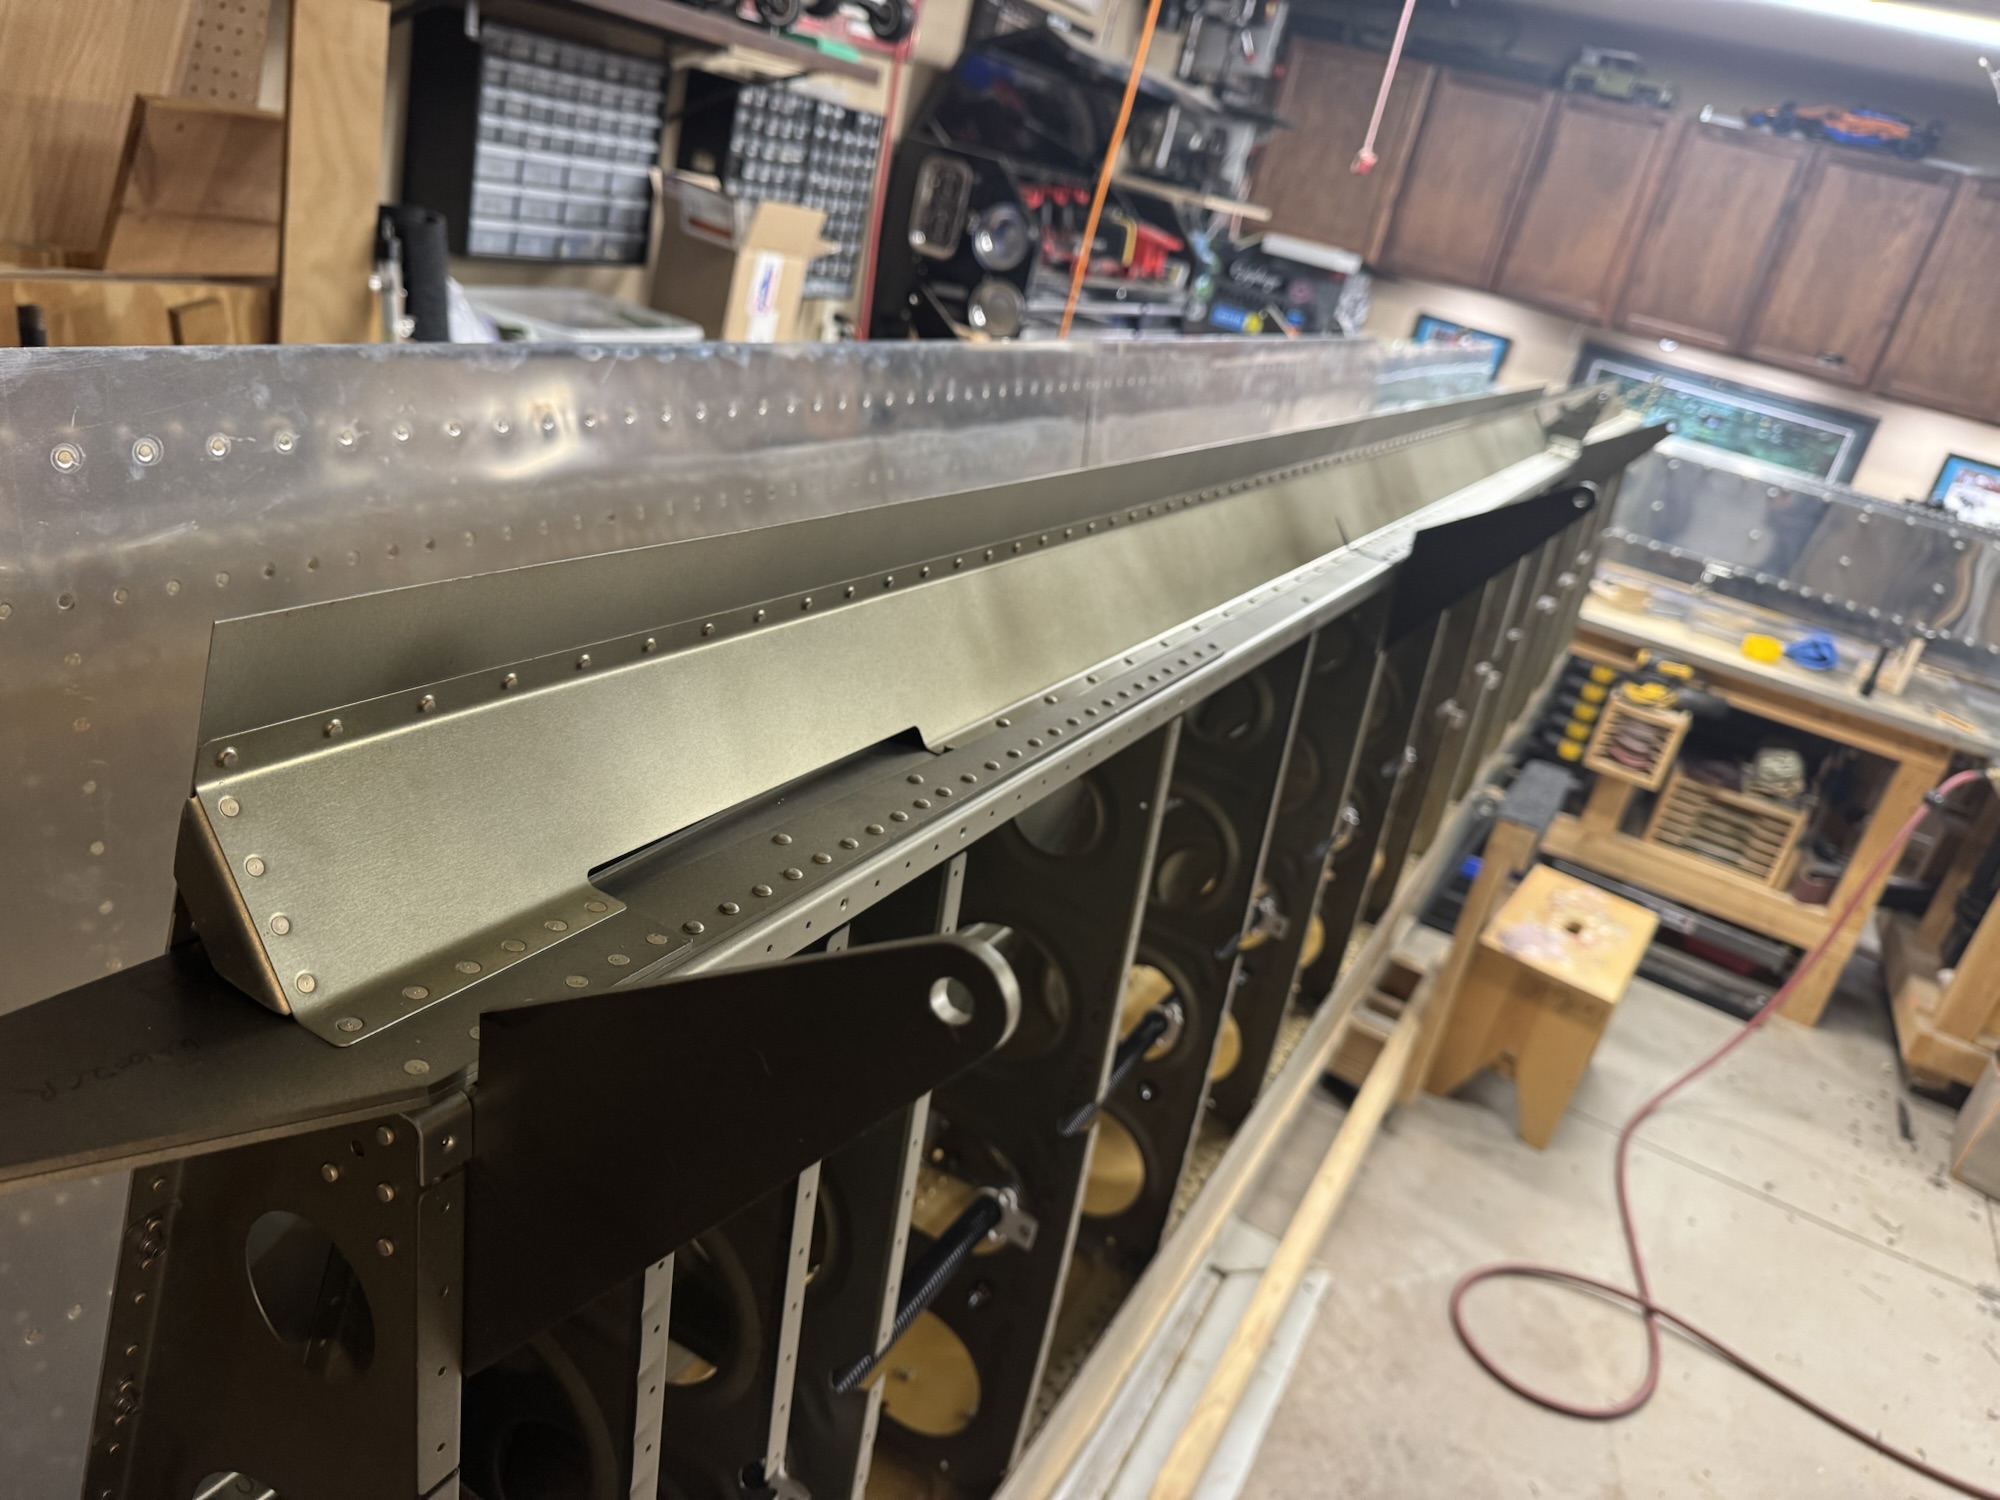
I installed the ailerons today but I couldn’t install the flaps because the bushing that goes into the mounting bracket on the wing is too wide to fit through the skins, so I will have to wait until I get the skins installed to install the flaps.
First, but pretty easy first steps on putting the bottom wing skins on, but took a bit of time to complete tonight. I got all of the skins deburred, dimpled, primed and riveted tonight that cover the gap between the wing and the flaps and ailerons. Luckily they were final sized holes so that cut about and hour to three hours off my time to cleco it in place, drill them all, remove it and deburr everything. Looking good and I plan on installing the ailerons and the one flap I have done tomorrow.
It took 4 hours but I got it done! I was kind of lazily watching Airventure at the same time but I got it done none the less. It is SUPER straight just like how the ailerons were. I’ve learned that the drilling of that trailing edge is critical to get it straight. I 3D printed a guide that had the right angle so it made it very predictable and easy to get the proper angle each and every time. I also changed the way I riveted the trailing edge this time around so I had no riveting marks in the skin. I used the squeezer with a flat set for the initial squeeze and then the final squeeze I used the angled set to get it right. It turned out really good! I substituted one solid rivet on the trailing edge for a pulled rivet just because I did not have a squeezer or bucking bar that could get in there. It already had one pulled rivet there so I felt having another one would not be a big deal. Now I just have to wait for my replacement parts to come in for the left flap which I don’t know when that will be here as alot of the crew for Van’s are at Airventure this week. The parts don’t show to be backordered so I’m hoping they will get it soon. I will probably start on getting the bottom skins going so that I can attach my flaps and ailerons. I just need to get the gap skin installed so I can install my flaps and ailerons and get them out of the way. I then need to get my pitot installed where I want it so that I can start getting the skin installed on the bottom of the wing. My final step will be to get the wing tips installed and wired and the wing kit will be done!
The fuel tanks are now 100% complete. The left tank held all of the pressure overnight and into this morning. I’m super happy that is now resolved and I will need to put that on my annual check to see how that sealant is doing. I might also see what I can do to build another tank later down the road to replace it with before I get a paint job on the plane. I’m glad it is solved for now!
I got all of the top portion of the riveting done. Took a bit as I didn’t measure the shank of the rivets I put in which were the 3.5 size. I did one rivet and realized it was too short. I had to pull all of the ones I had staged and put the 4 size rivets in. I got all of them set along the spar flange as well as the top rib flange. And to wrap the night up I got the bottom skin clecoed in place. I’ll have to put in rivets tomorrow and get them set. The rest will be much easier since they are all blind rivets so I just have to pull out my pop gun and pull a bunch of rivets.