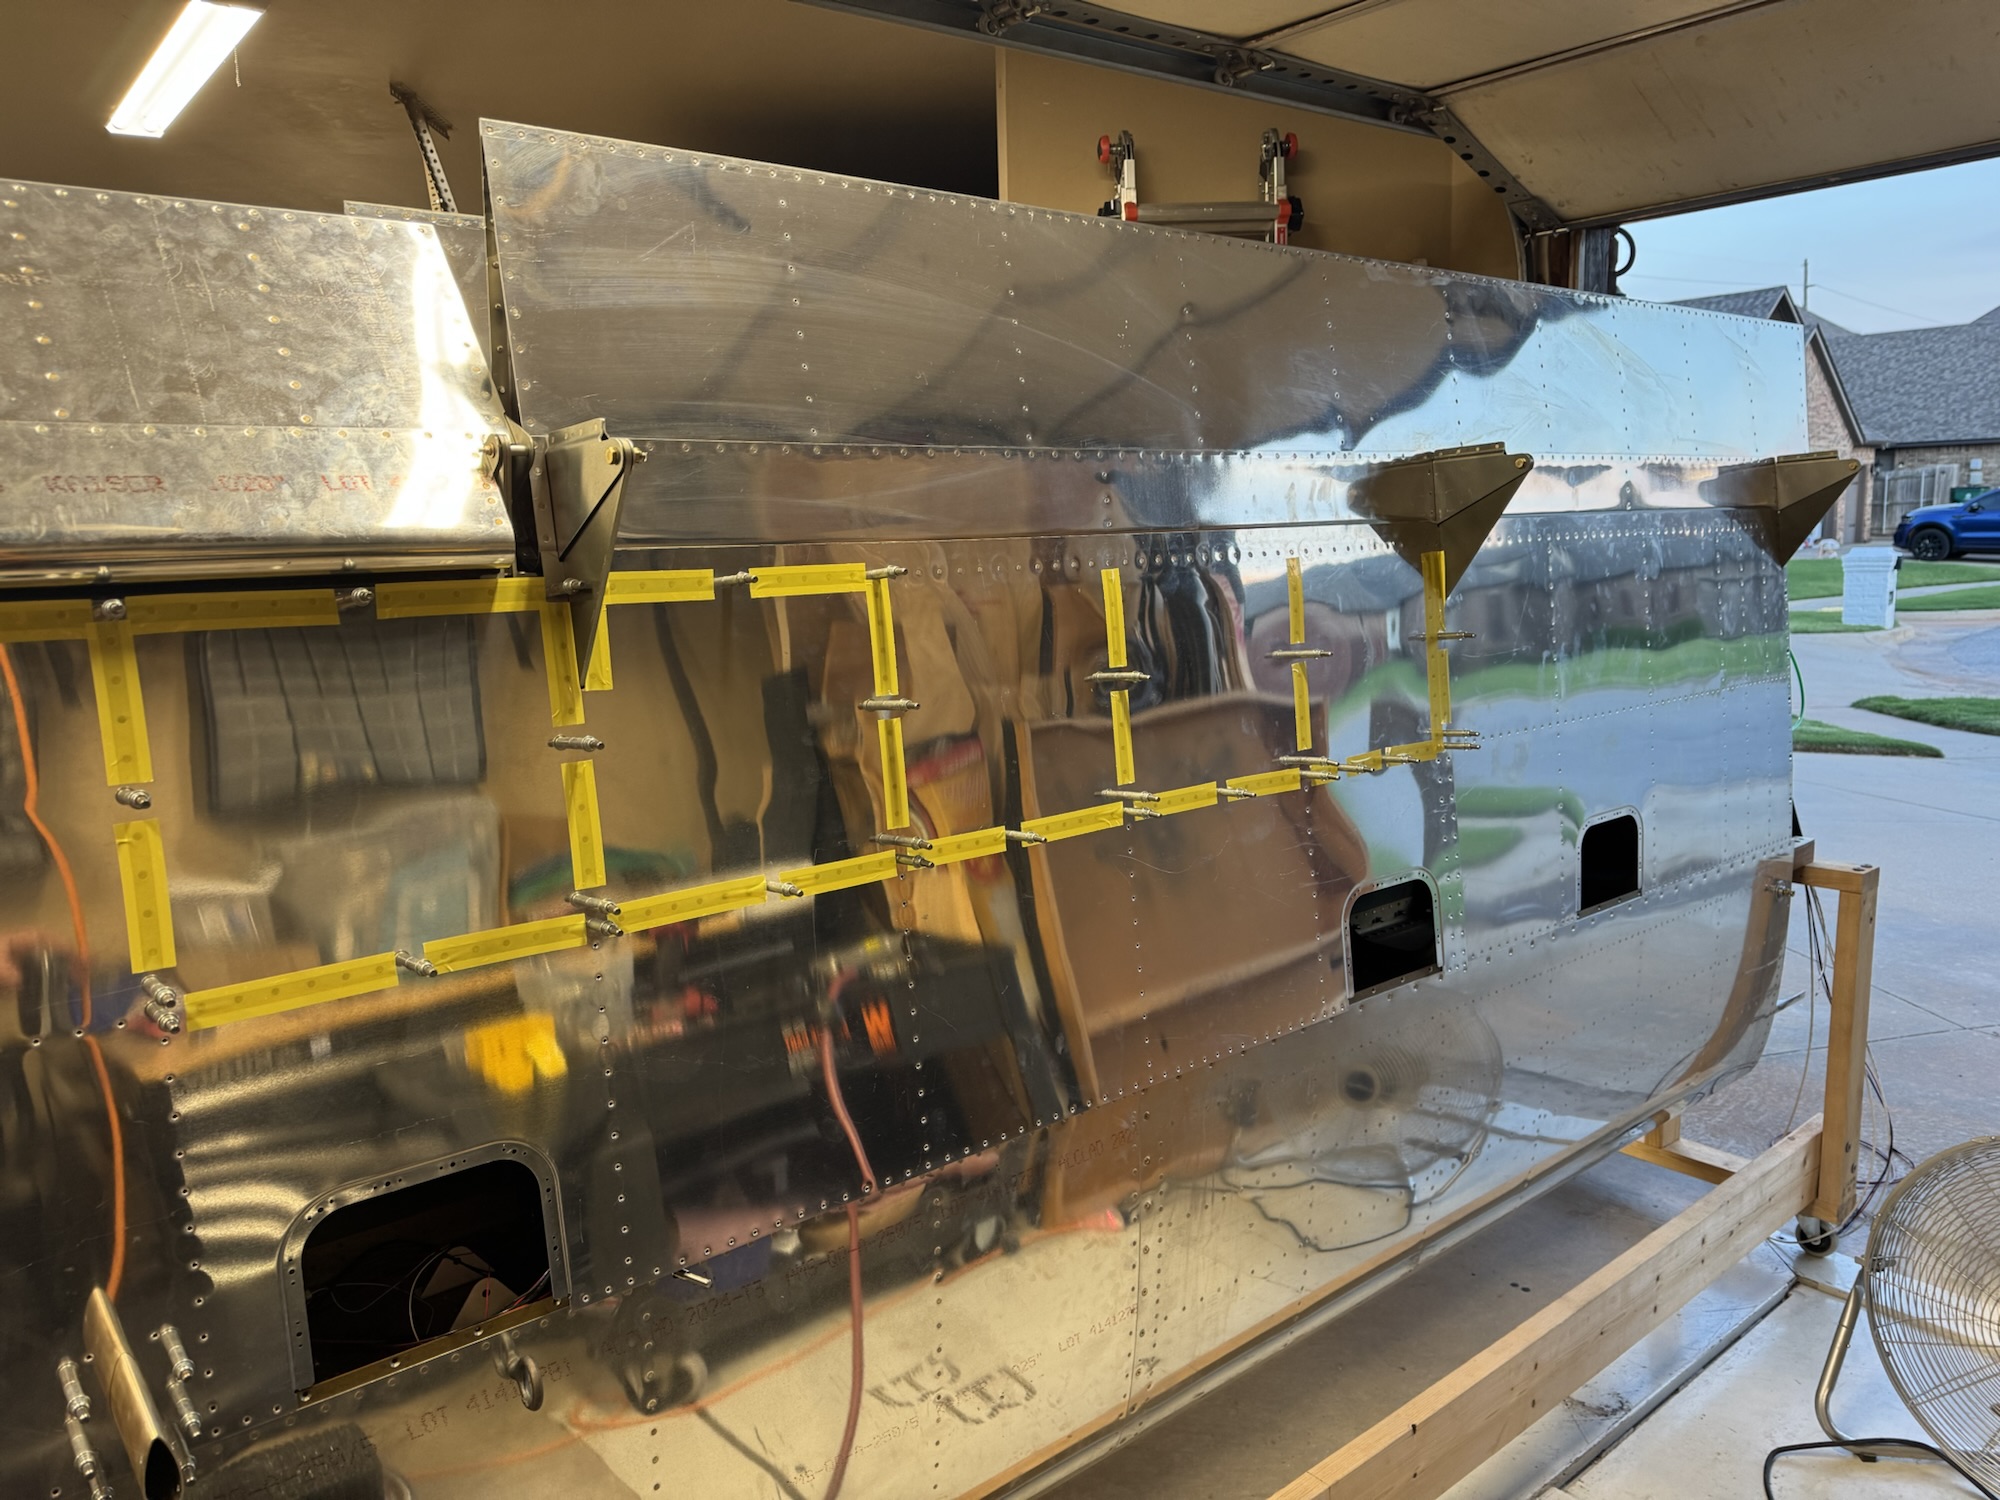
The new pitot mount and the rivets came in today a little after noon. I got the new pitot mount drilled and prepped and I riveted just the pitot mount in. It went excellent! I then got the support bracket drilled and I was able to double the amount of rivets in the bracket which made it much studier. I went by my EAA tech counselor’s house to get two longer rivets which I did not have. They fit and as you can see below it looks MUCH better!
I then got to finishing the rest of the wing skin and I also got the pitot itself mounted and plugged up. I just need to figure out how to manage the cabling with some adel clamps and then it will be 100% done!
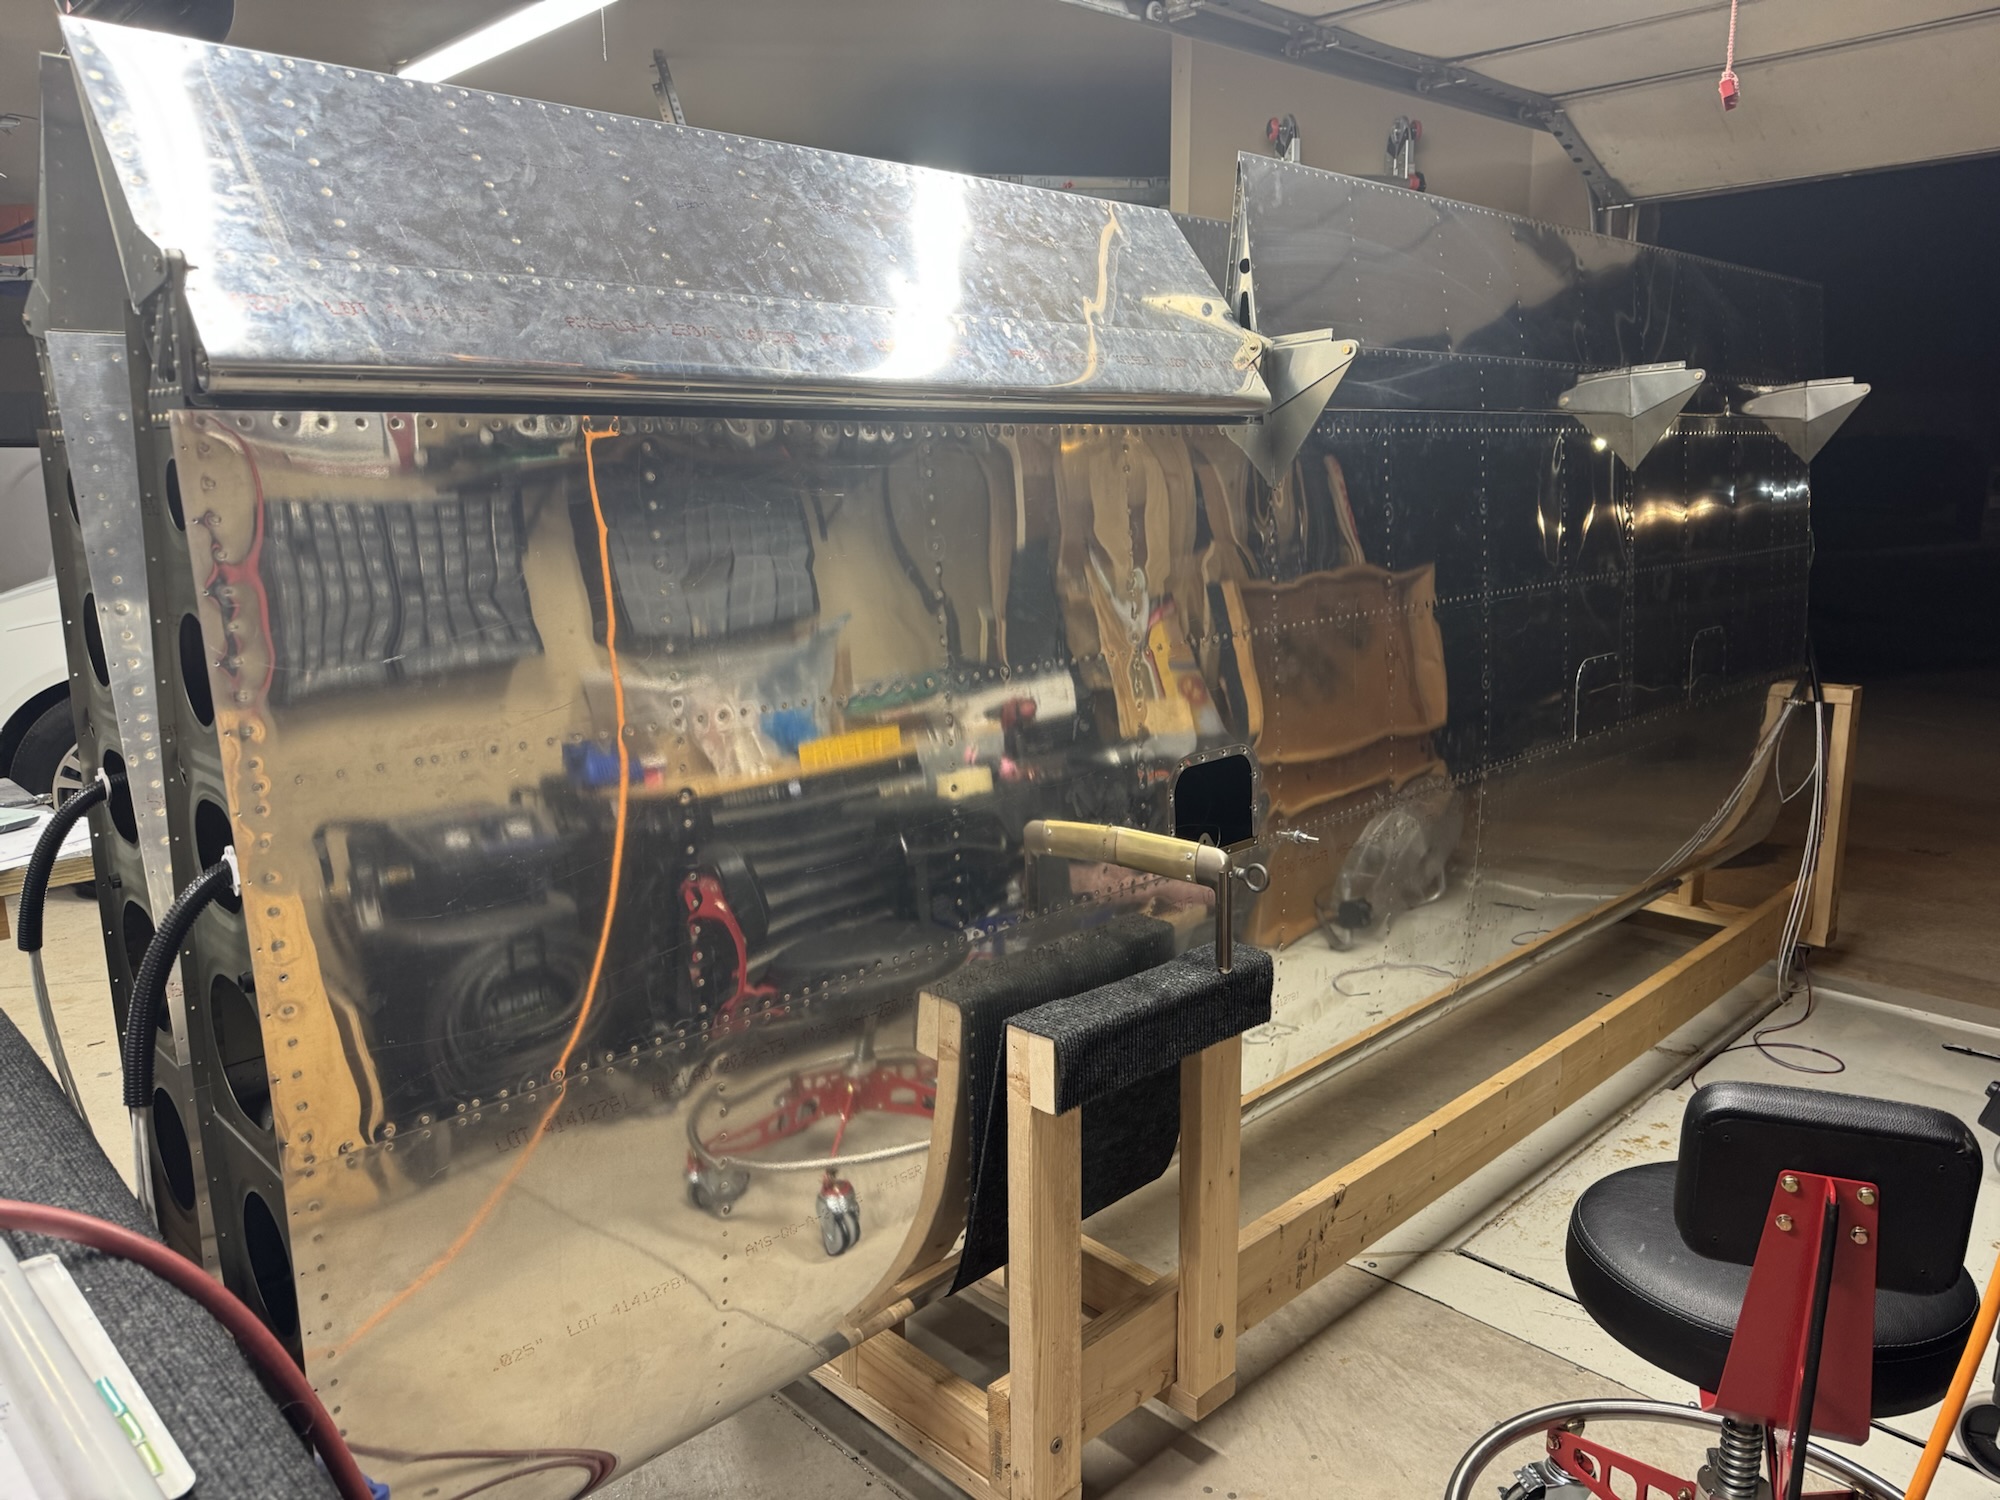
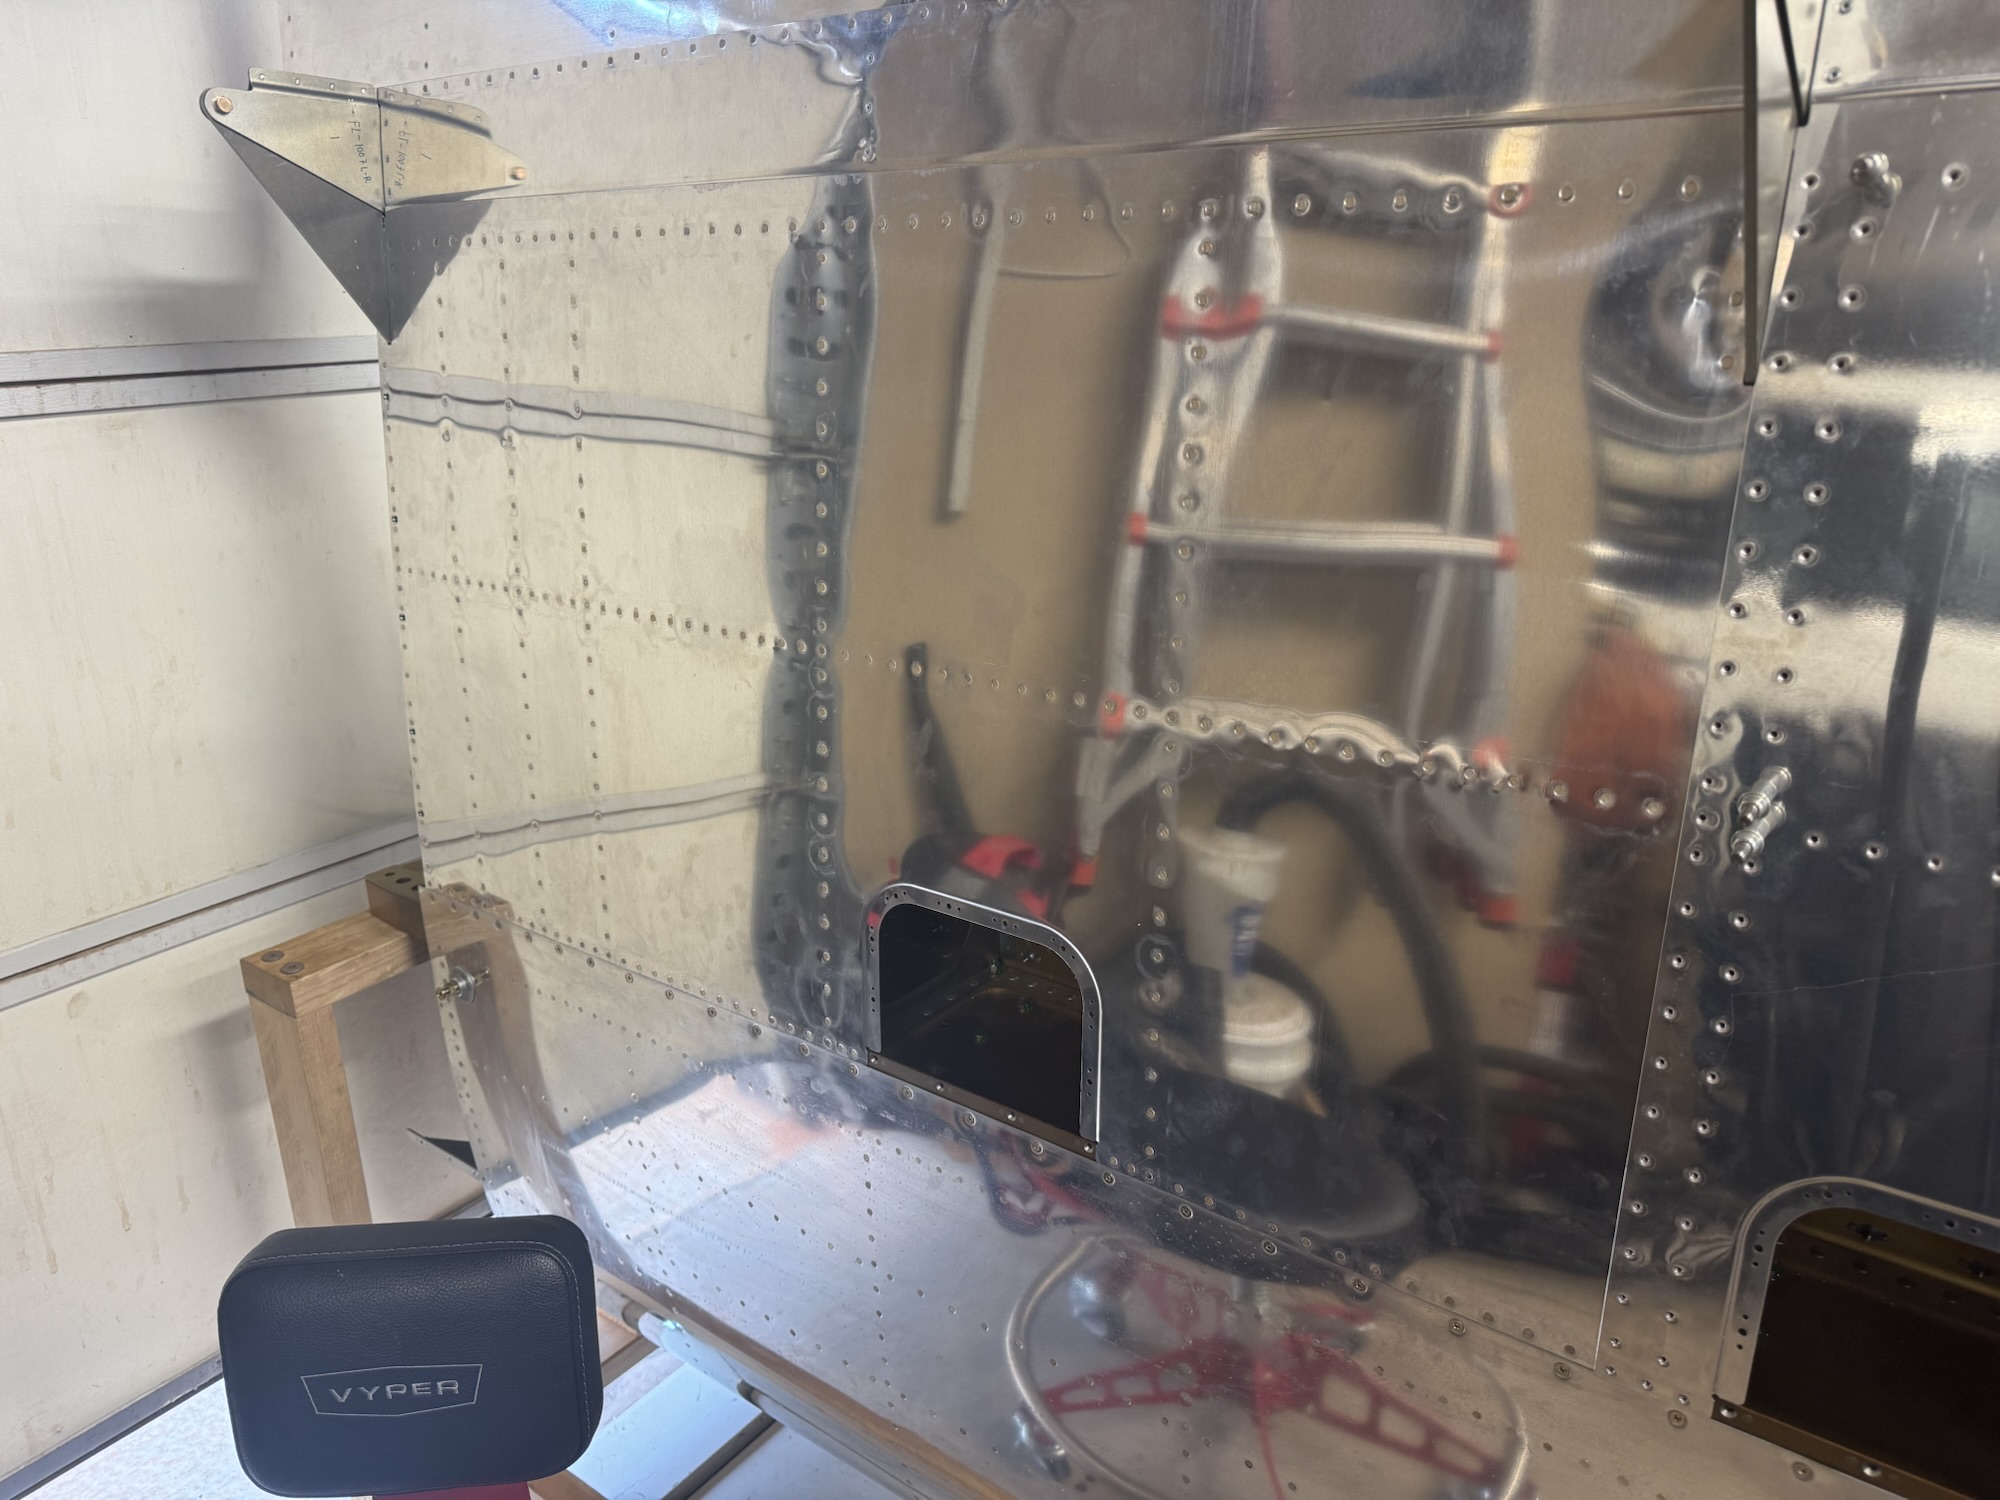
I got the first half of the left outboard bottom skin done tonight as well as the pitot tube mount. That was a pain in the rear and I left some marks on the mount when the bucking bar kept slipping off one of the rivets. Such a pain in the rear lol I hope to get at least a little bit of work done tomorrow night but we are going out on visits for the elder’s quorum so that might only be like 15 minutes or so. We’ll see.
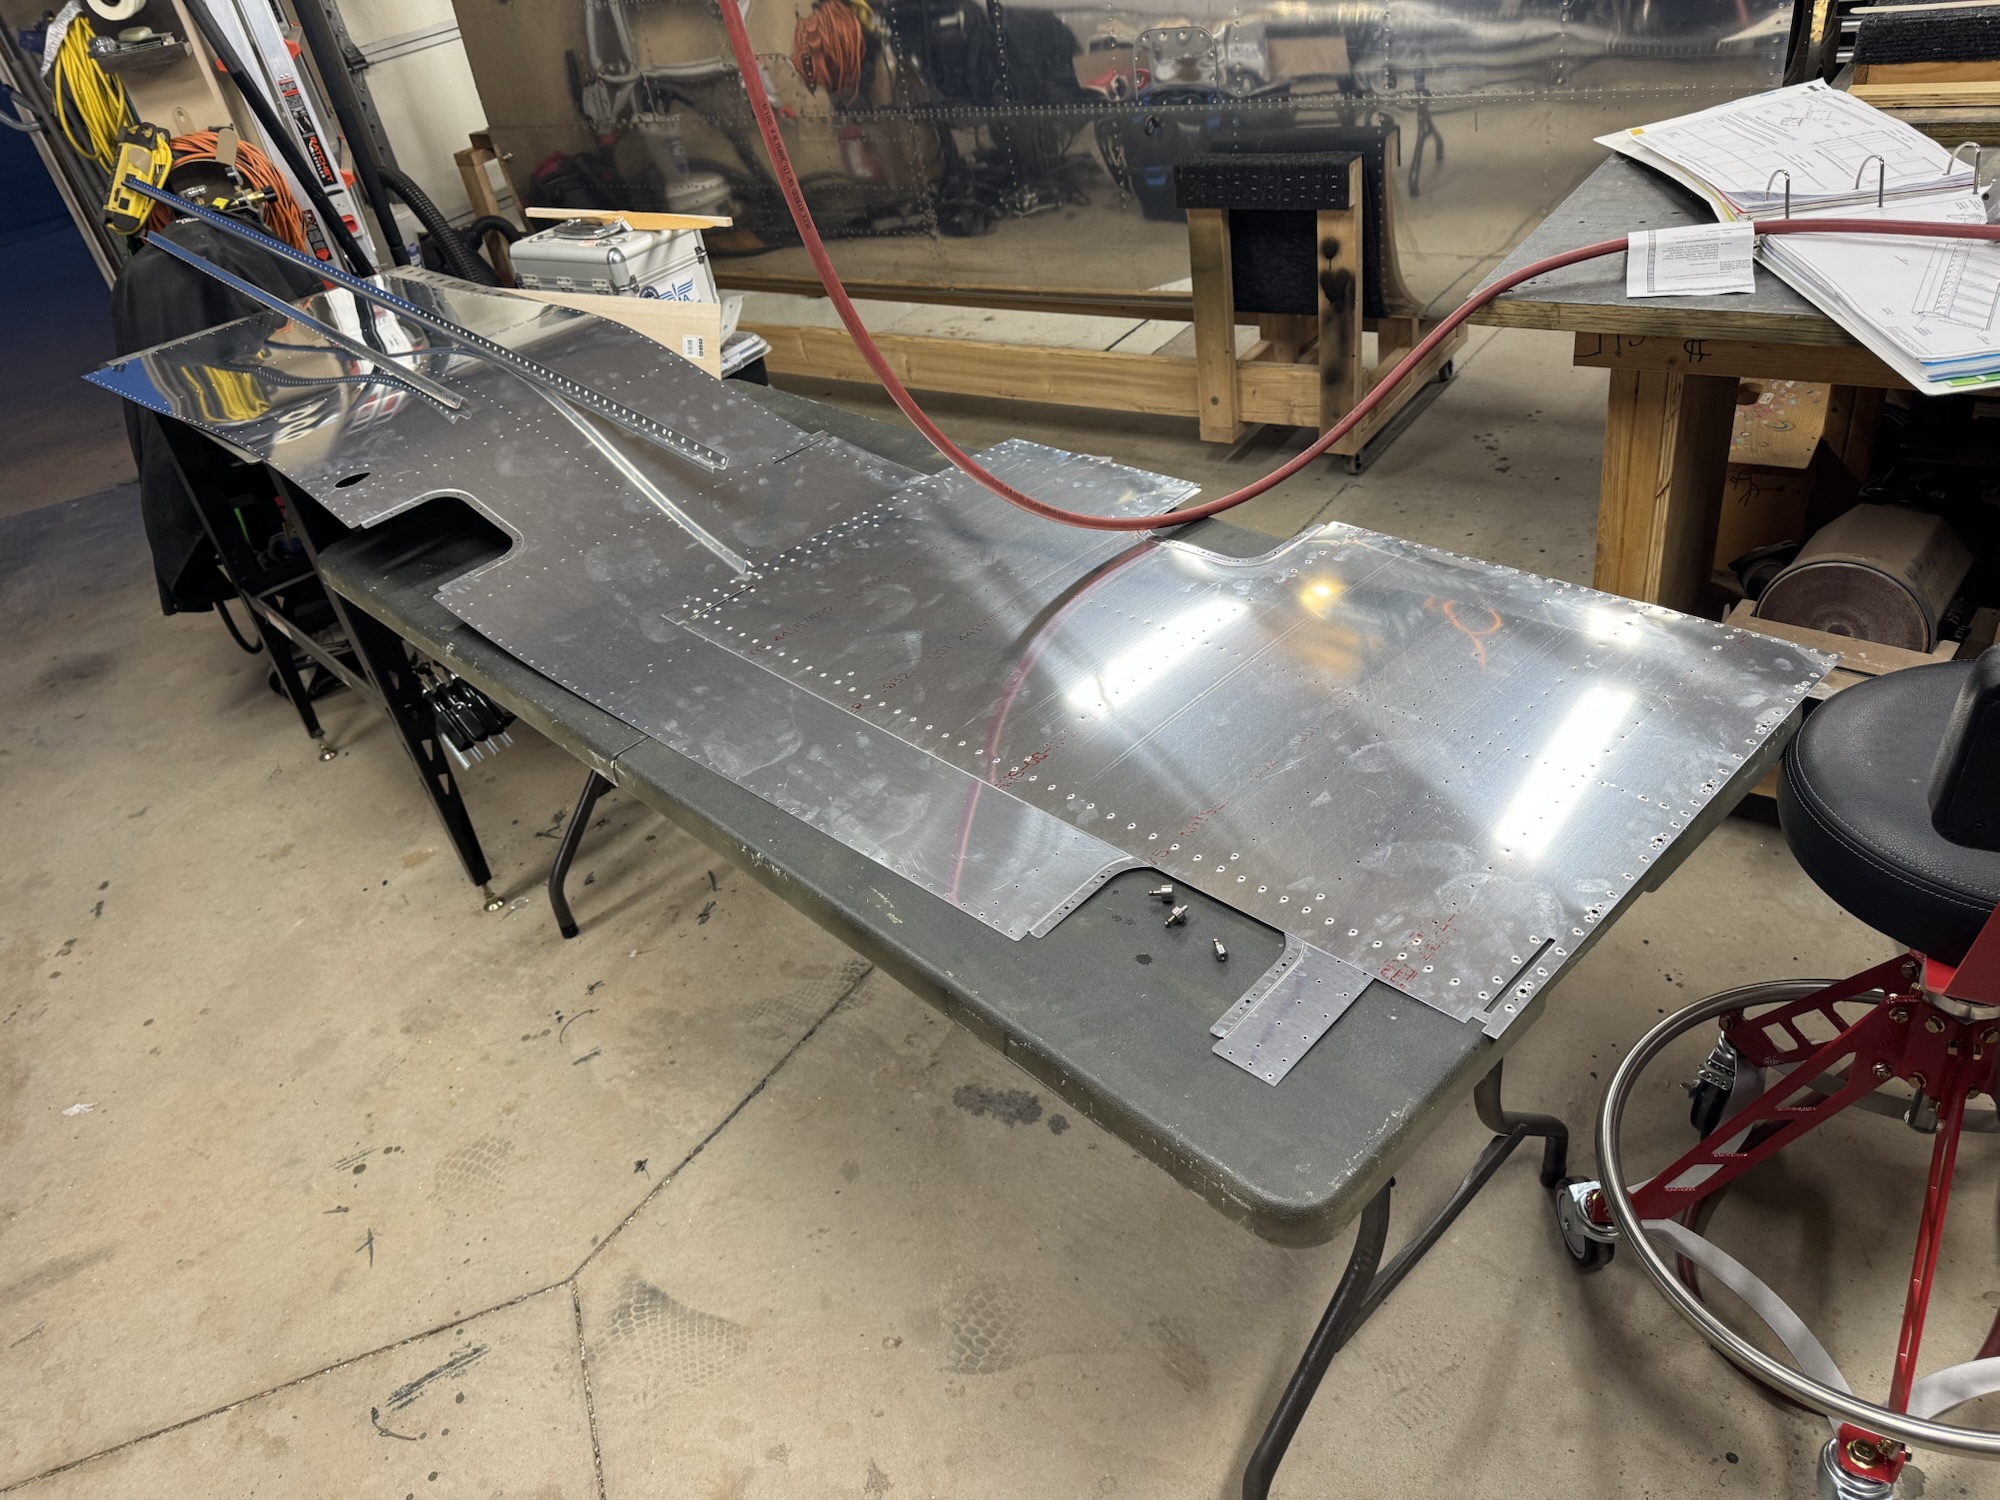
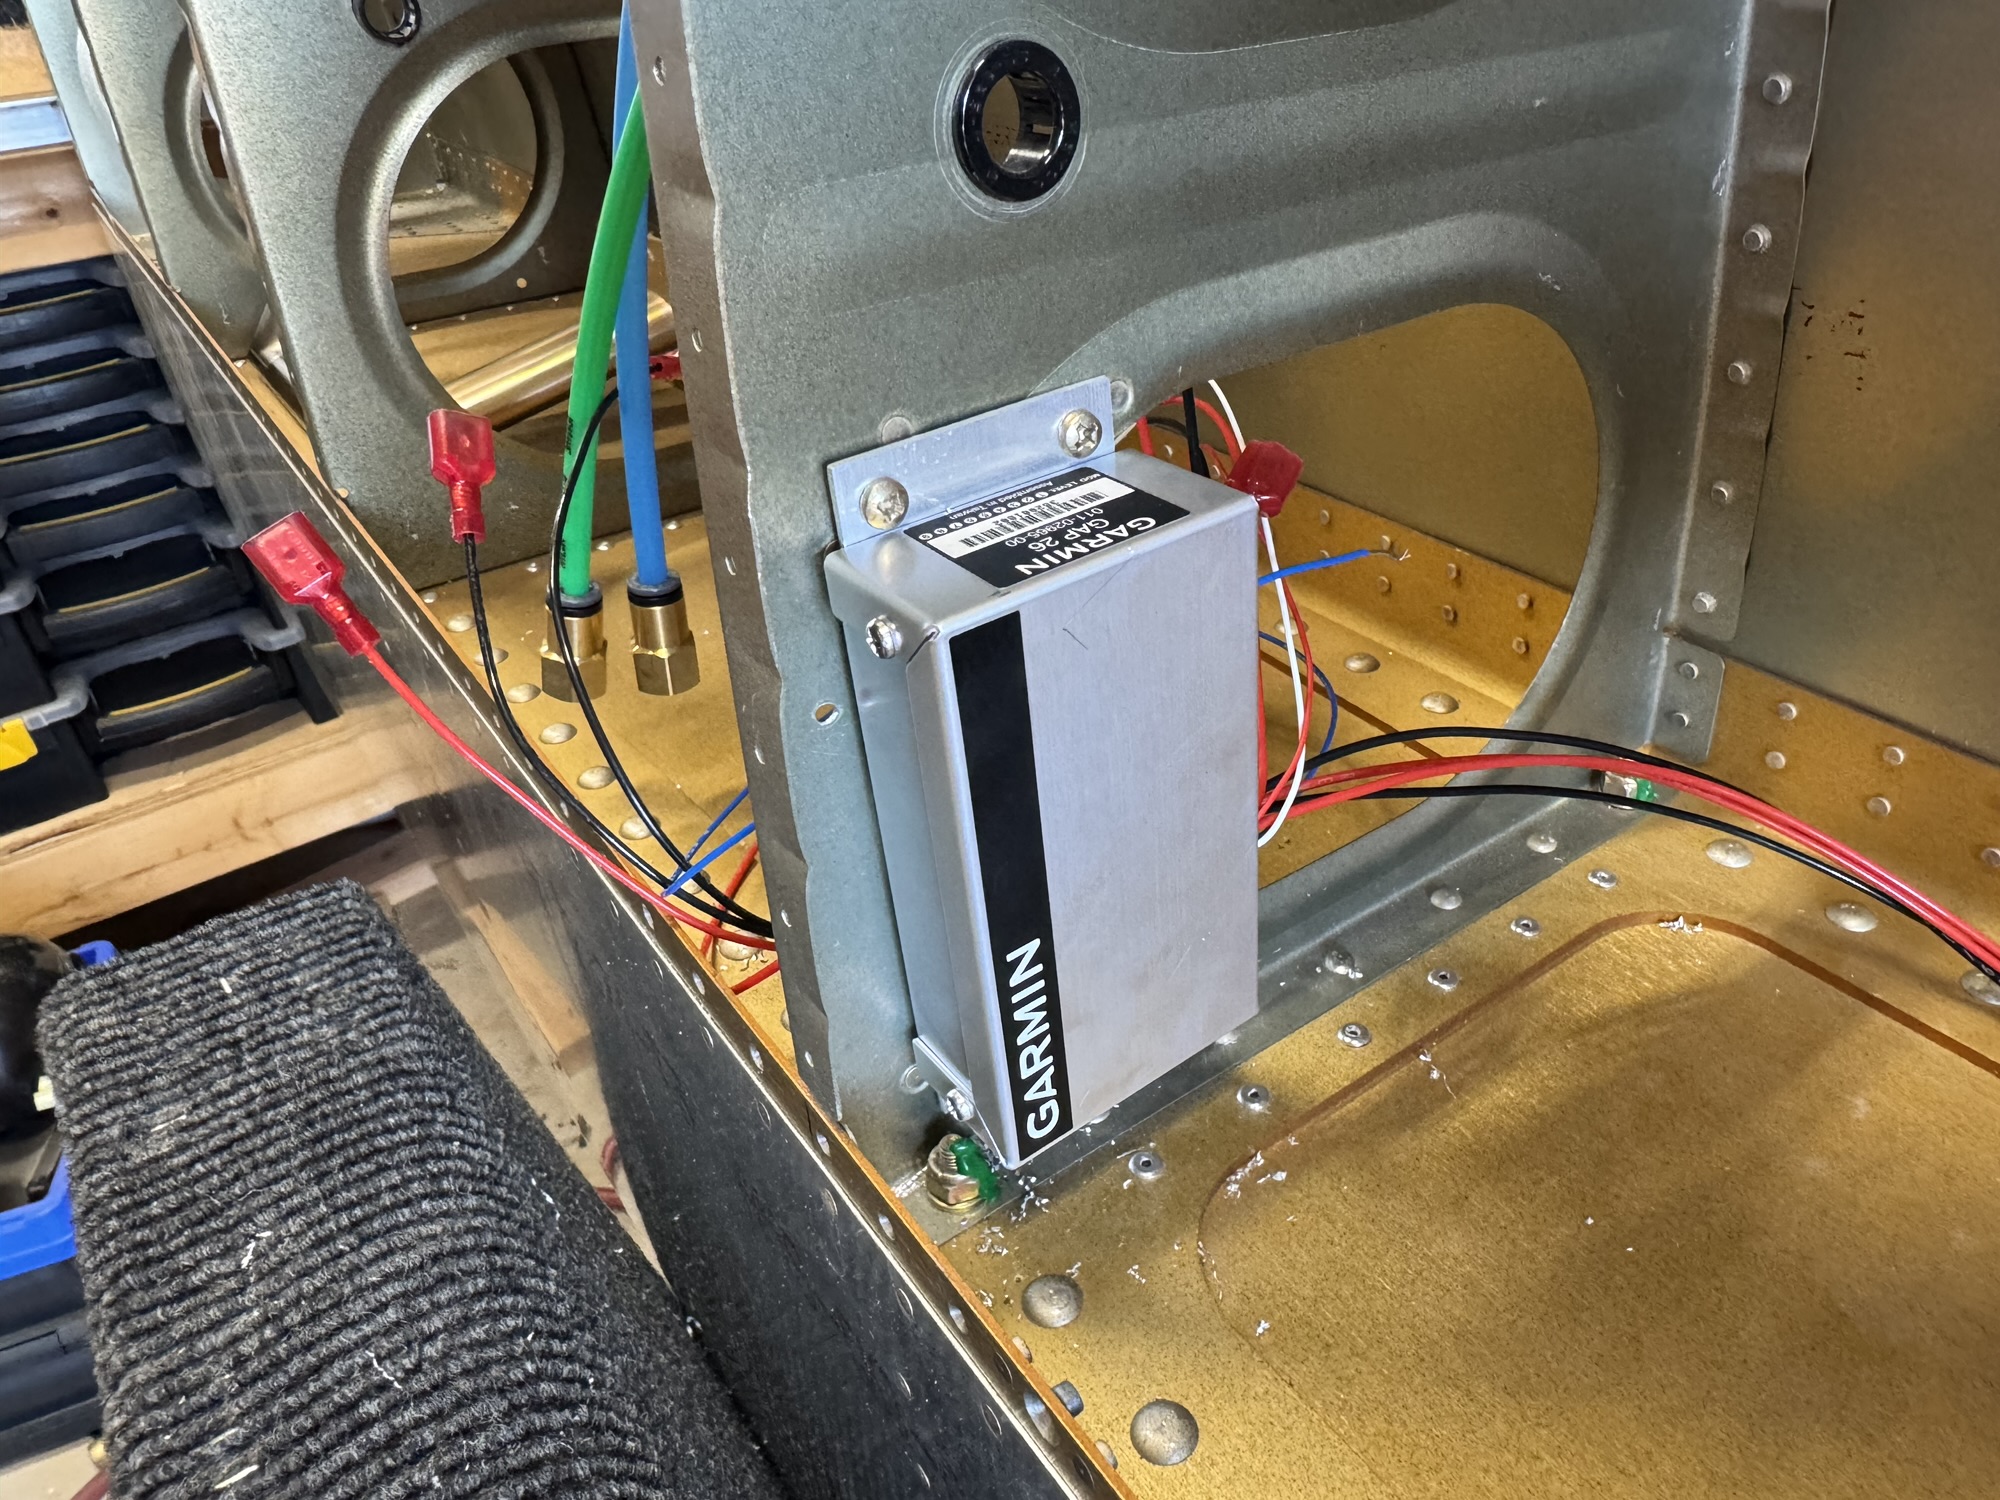
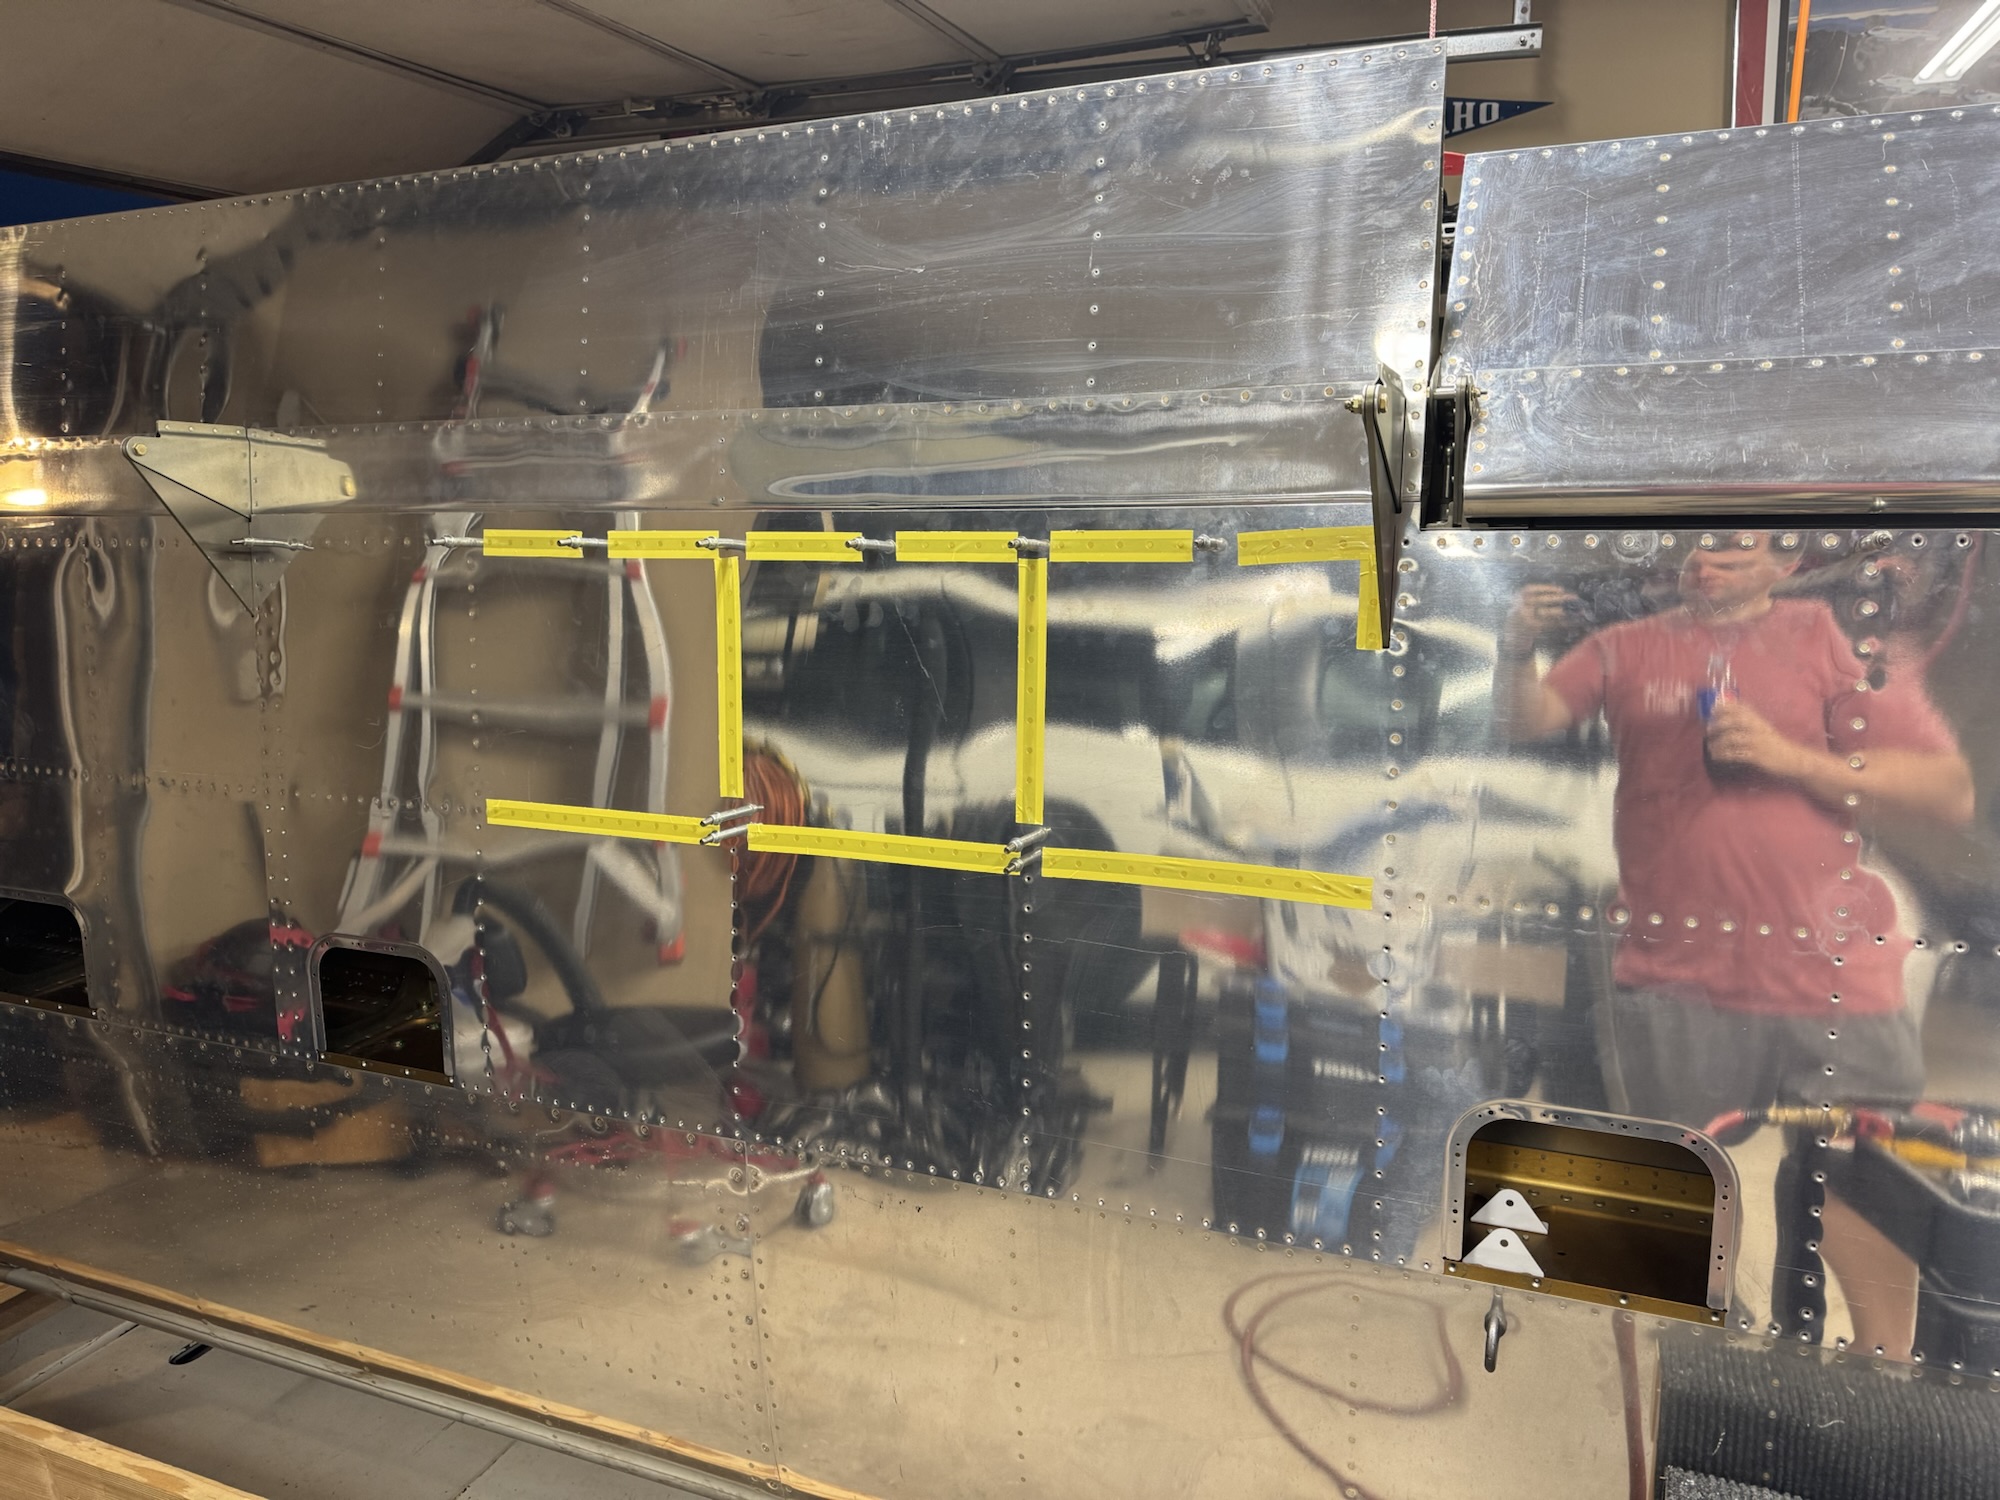
The last of my wire order came in. I got the wires run and I soldered them to the Garmin GAP 26 controller. I put the outboard bottom skin on the wing and installed the flap on the wing. I got a series of the rivets setup and ready for riveting and I got a few of them set but I was done for the day. I hope to at least finish the first phase of the riveting tomorrow night if not just finish the bottom skin entirely. I also brought the wing tips down as well as the aileron actuation components down so that I am ready to start the next sections of the wing kit.
I did a few things today which was nice to get caught back up on. I started off by priming the parts this morning. After getting back from the temple I started by getting the pitot ready for installation. It came together very easily and everything fit just great!
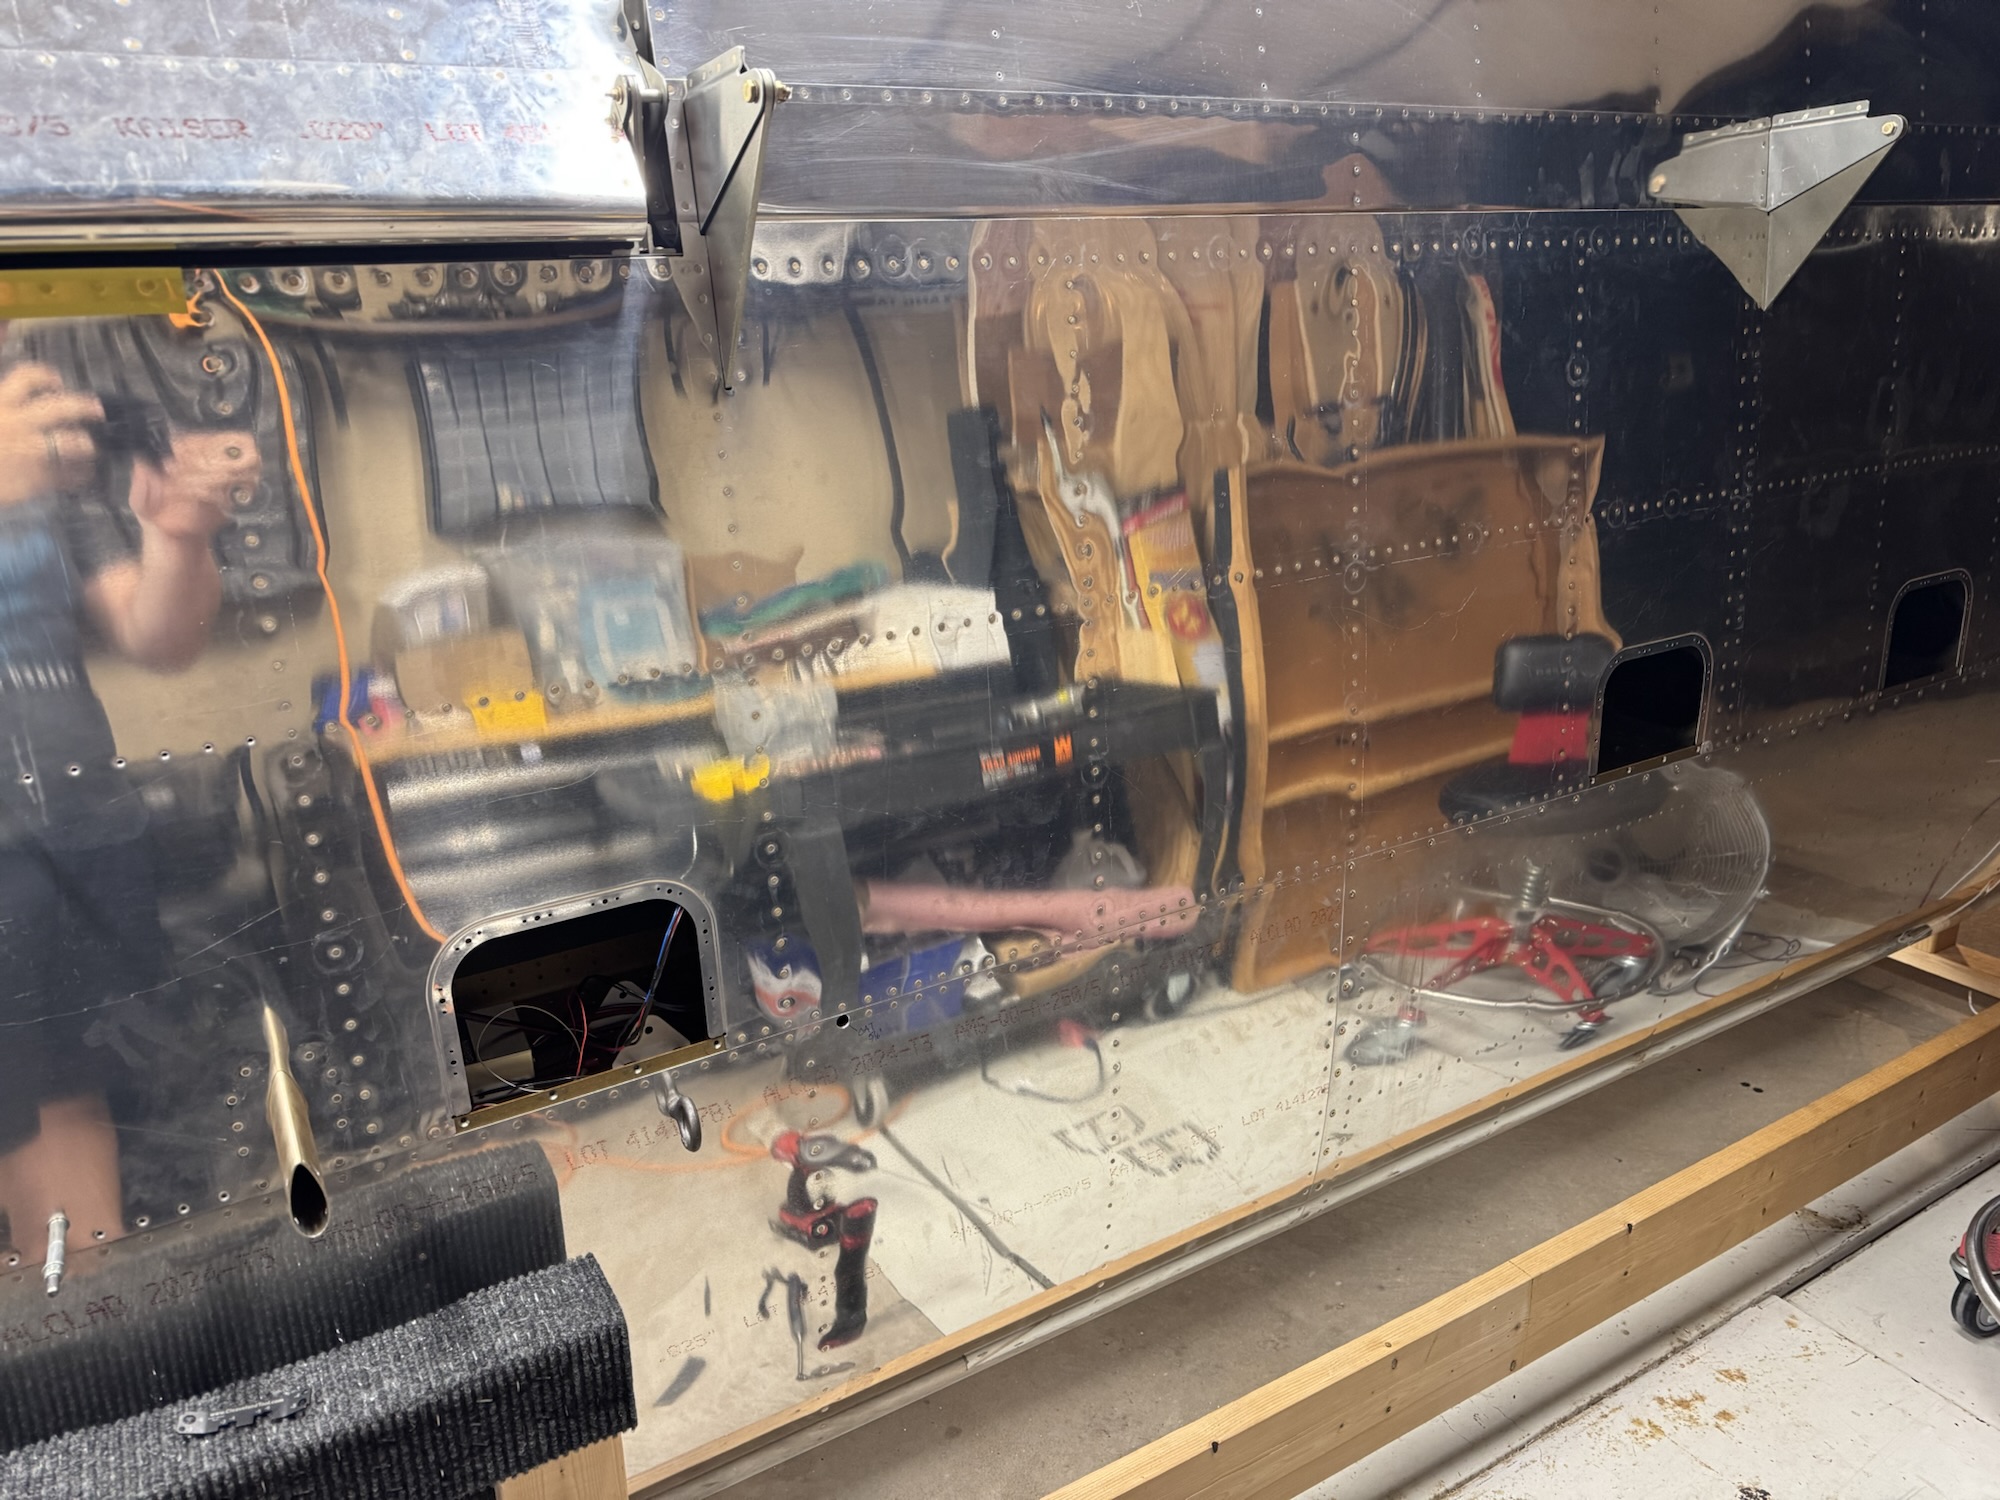
I then got the inboard bottom skin riveted in place. And then I wrapped up the night by installing the cabling that came in today. I just need another pair of cables that were supposed to come in today which will power and control the pitot heater control box. Once I have that I can get everything buttoned up wiring wise and then put on the outboard bottom wing skin. So I should have the wing skins done sometime this coming week as long as the cables come in on Monday which it says they are now scheduled for delivery.
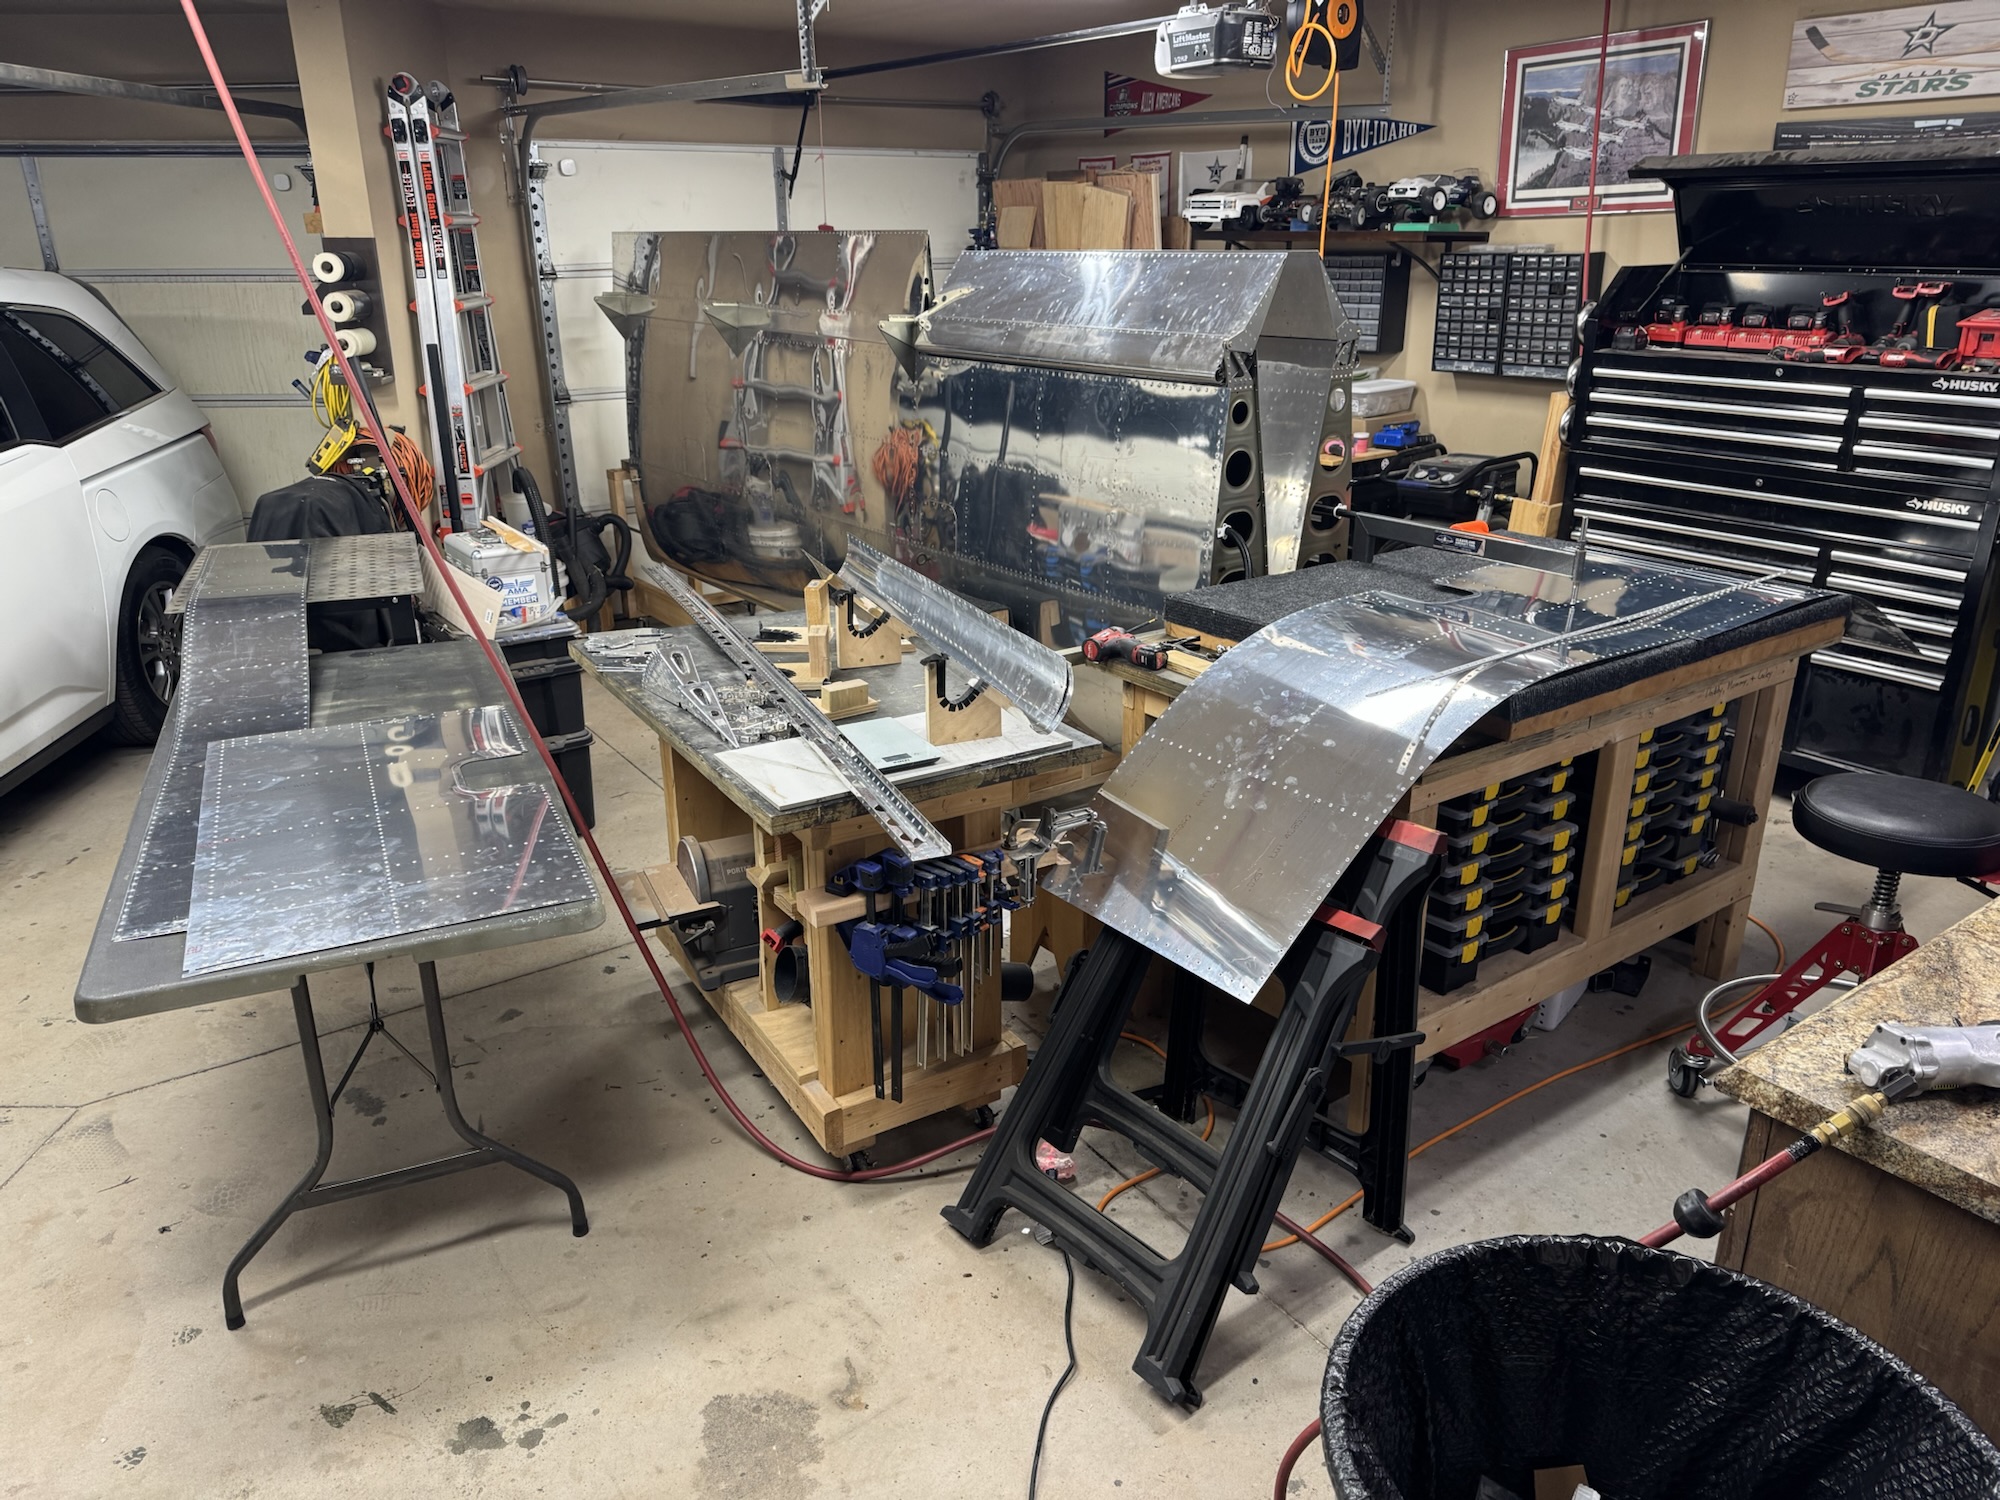
This will be one of two posts today with basically the same info. I worked on both the bottom wing skins as well as the last flap. I got all of the skins deburred (the only section I needed to debur was the overlapping section between the two skins and then the pitot mount) and I dimpled all of the parts. Pretty repetitive but glad to have it done. I just need to prime the parts tomorrow and then I can at least get the inboard skin installed. I want to hold off on installing the outboard skin so that I can get everything buttoned up electronically for the pitot, AOA, and wingtip lights while I still have easy access to everything.
I spent quite a bit of time today reading through books that I had bought that talked about how to plan for your electrical installation, how to design it properly etc. I wanted to try to get as much of a head start as I can on my class coming up here in two weeks as I could. I also wanted to make sure I was getting the wires that I needed to install now as the right size, etc. One of the wires I was not sure about was the wiring for the wing tips from Aeroleds. They gave me hardware for 18GA wire but from what I am understanding for the sizing I would need 16GA or even 14GA for the landing light and definitely 16GA for the taxi light and ACS. But they also recommended that I get three strands, each with four conductors. Well the largest gauge wire I could find in that was 18GA. I gave them a call this morning and spoke with one of their engineers/designers and he stated that while if you want full voltage (which my system will be putting out around 13.8 volts or more since it is a 14 volt system) then a 14-16GA wire is definitely the right choice, but the design of these lights is set to run on 12.5 volts and still be fully functional. This is why they gave you the 18GA connectors but of course they still leave it up to you on the choice of wire gauge. Ken stated that he had been running it on 18GA wire without any issues so that I what I plan to do. I got all of that ordered today from Steinair and hopefully I can get those run next week when it all arrives so that it will be there and ready when I get the wingtips installed. I need to research how much the connector at the wing root will add to the resistance as I will need to make sure I can disconnect the lights for wing removal. Luckily even if I do change my mind I can still do it and I can use this wiring somewhere else still.
Now on to the biggest story which was the pitot install. Since the pitot does not come with the four screws to attach it to the pitot mast I went by the local aircraft supply store and they just happened to have some AN526-632-4R which would fit this scenario just perfectly. I bought the bag for $5 and brought them home after work. The first three screws went in without an issue. The fourth and final one though felt just a slight bit more difficult to turn (remember all screws and fasteners for aviation are much tighter for vibration so it seems to always feel like you are cross threading things). I slowed down some but kept going when all of a sudden the screw snapped! And it didn’t leave enough for me to get ahold of with my pliers so I filed it down some to get a flat surface, used my centering punch and started drilling. Well that got off center and then ended up messing up the threads in the pitot. Well… I can always upsize the hole. So I went to drill out the remainder of the screw and then I screwed through the entire weatherproofing seal at the top! SMH With the ruined wiring, the messed up mounting hole, and now this weather seal punctured, I decided to just call this the spare parts pitot and order a new one. I have to look at the bright side that at least this new one will have excellent connectors on it which I don’t have to mend and I don’t have any work to do with it except slide it into the mast and install it. Boy… a lesson learned and definitely an expensive one at $670.
I did get good use of the rest of my time though and I started dimpling the parts for the left wing. I want to get the inner skin installed tomorrow if at all possible, but if I can’t that’s fine as I don’t want to rush just to meet an objective. I hope to have the new Van’s flap parts on Monday or Tuesday as I thought they were supposed to arrive yesterday but that was actually OAT probe or something else I can’t remember now. So hopefully I’ll get the flaps section done soon so that I can be wrapped up with those past sections and just be focused on the bottom skins section.
Oh! I did have a call with my EAA technical advisor about the exits or branches I wanted to do on my existing conduit. He said it is completely acceptable to make a hole for the exit and that I could use electrical tape to seal it off or since I shouldn’t be planning to go back in there for a very long time I could put silicon sealant in it. Just to allow for future changes and modifications I decided to do electrical tape so I cut those two exits (one for the OAT and another for the pitot heater control) and got those as finished as I could. I am waiting on the 14GA wire for the pitot heat and ground that should be coming in tomorrow. I will get my heat shrink and soldering out, connect those up and run the wires through the conduit and seal it up with electrical tape.
Lots of little things being done but it is good to keep making progress (even though this thing makes me feel like an idiot every day!)
I took the skins off the left wing today and decided I was going to finalize the OAT and pitot installation as much as I could today. I drilled the hole where the original pitot tube was to be installed but unfortunately I did not drill it to the right size. I drilled it to the size of the pitot hardware and not the OAT probe. I have some washers right now that will sandwich over the hole but I’ve ordered a sleeve as well so that it will keep everything centered and hopefully I can even press fit it in to the spot so that I can get rid of the washers all together. It is only 1/8 of an inch larger so the edges of the OAT sensor and the nut cover it all and give perches but I really want that sleeve. If that doesn’t work I’ll just use the washers as this is a fairly small probe which won’t take alot of wind force as it is. It is just unfortunately that I did not live by the motto of measure twice cut once.
After that I decided I was going to get the pitot cabling fixed that I had botched up a couple of months ago. Unfortunately the local aircraft hardware supply did not have the right spade connectors. They ordered them and should show up Monday. I can then recrimp these wires and it will be fixed.
I decided to up the rivet hole that is mounting the rear side of the pitot mast/mount to a -4 rivet to give it extra strength which didn’t take much time to do. I then did all of the work to mount the controller box which actually wasn’t as difficult as I thought it would be.
Oh and I forgot to mention that earlier in the day while I was on conference calls I flared the ends of the pitot tubes and got everything prepped there. I also added the union hardware on to the pitot lines that were already in the wings from previous work I had done.
I wrapped up the day by drilling the holes for the pitot into the mast/mount. I’ll have to get hardware for this tomorrow as well as I thought I had gotten some when I purchased this but I forget that almost all of the Garmin stuff does not come with any hardware and you have to provide it.
Between breaks at work, lunch, and then tonight I was able to get the rest of the bottom skins riveted on! I only have a few marks on my arm from trying to squeeze into really tight spaces but it all worked out pretty good! Now I need to work on getting the pitot system worked out on the left wing. Hopefully the OAT probe will arrive soon so I can get that installed. Luckily the rest of my Van’s parts should be arriving tomorrow so I can get the other flap finished too!
I got two quadrants of the larger outboard skin riveted on today. I also got all of the rivets loaded for the section they want me to finish first before moving down towards the main spar and then moving from inboard to outboard on the last three bays of the wing. I didn’t get too much time tonight as we has a service project for our elders quorum tonight that took a good 2.5 hours from door to door.
I also started planning the wiring that I will need for the wing tips so that I can get that ordered. I also ordered my outside air temperature (OAT) sensor today. That was $610 to get going. I’m going to install it in the factory location for the pitot since I’m using a different location for mine. This way I can get accurate OAT readings since it will not be in the slip stream of the engine exhaust, etc.
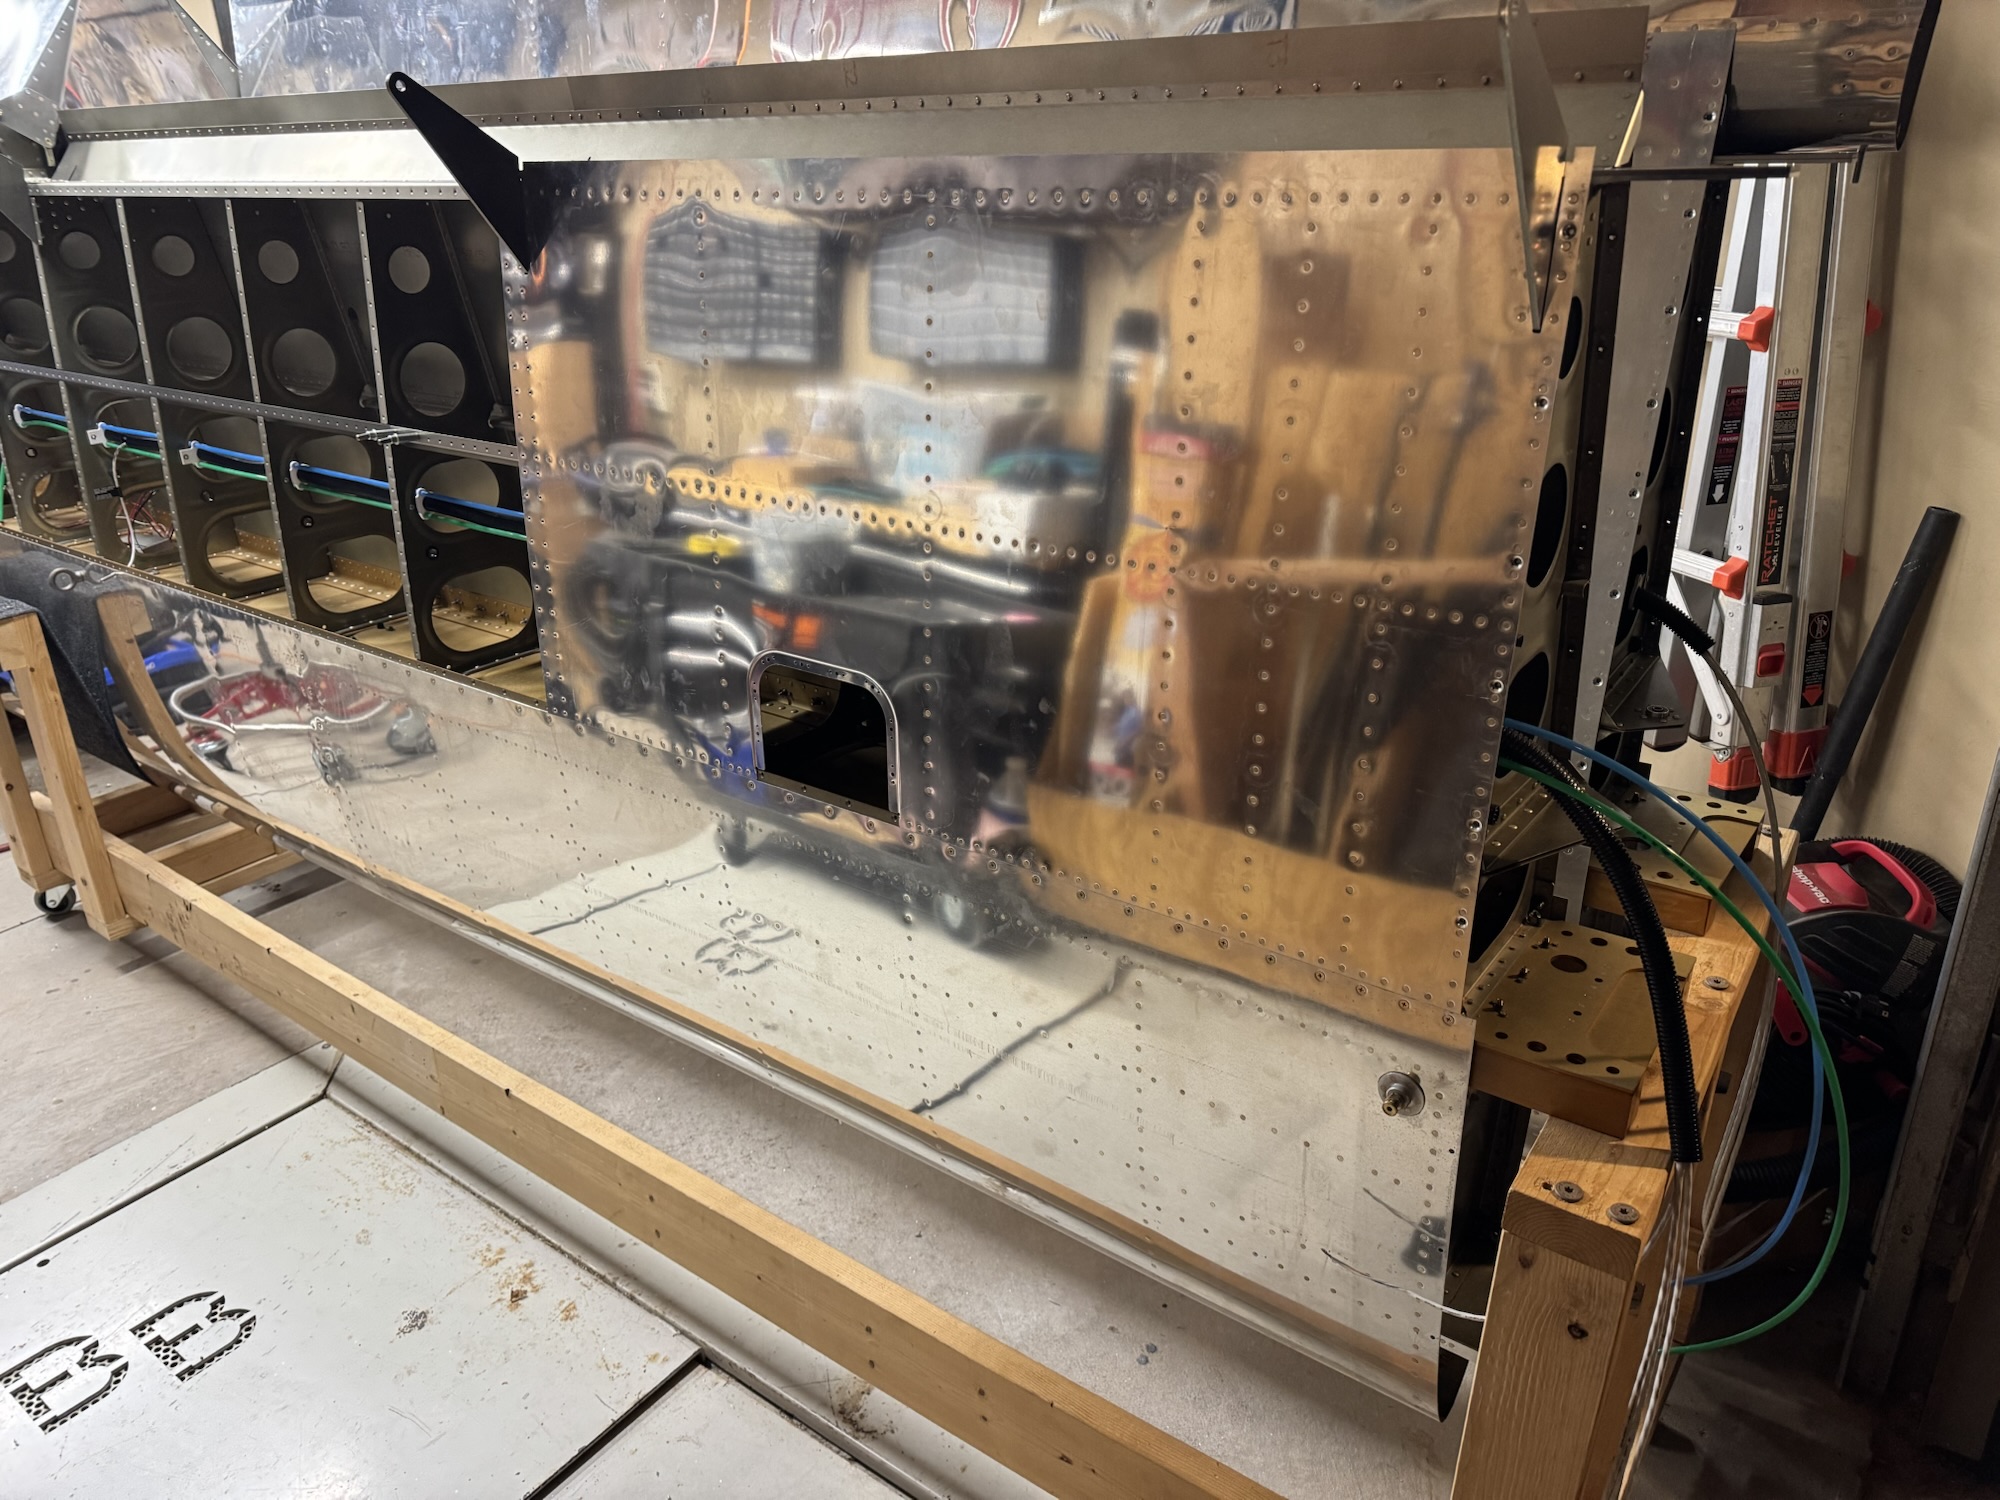
I spent a little bit of time today wrapping up the right inboard skin. I know one thing I am changing on the left wing is that I will remove more clecos to get to the rear spar. That was a very difficult reach to get done the way they described they wanted it done in the manual.